Friday, December 12, 2008

Moving panes

...are now assembled. No more windows needed for this car, except in the clerestory. It's coming along nicely.

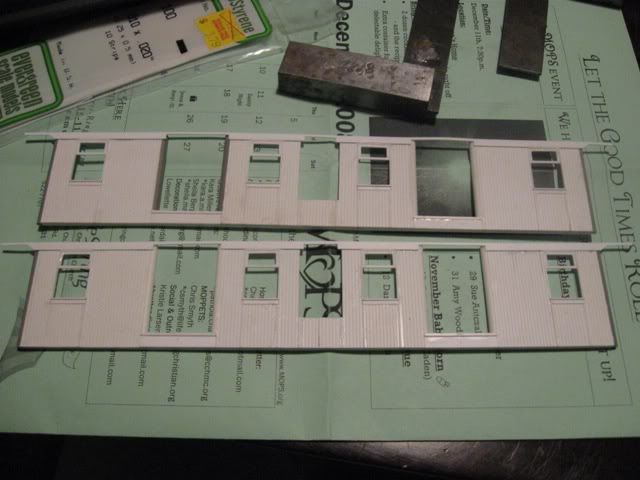
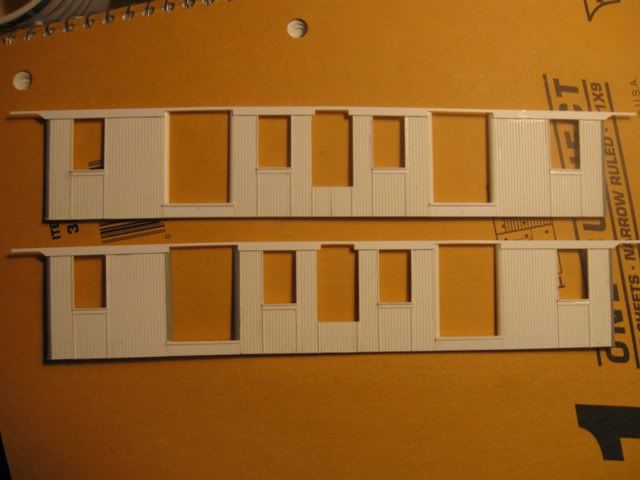
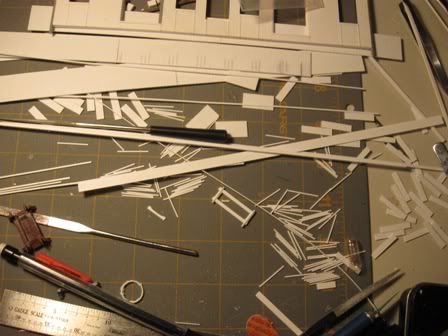
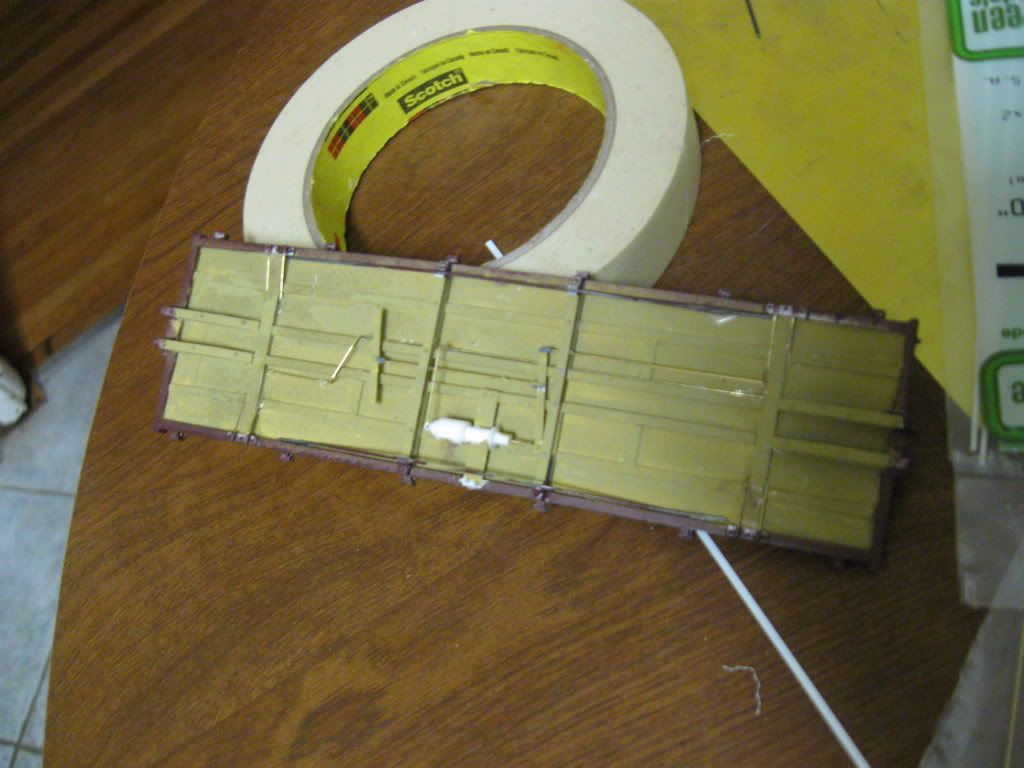
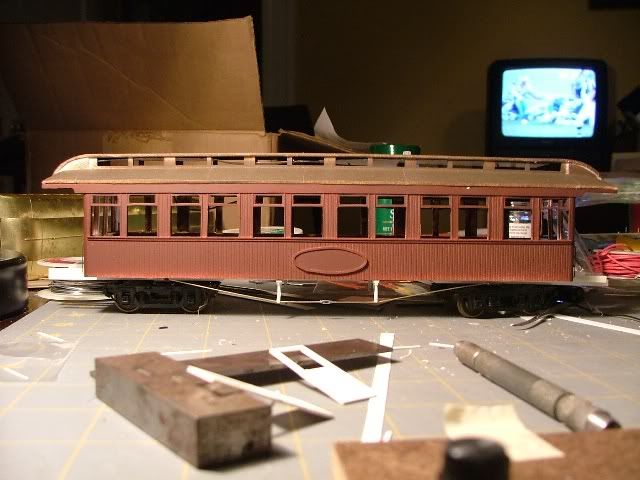
I'm looking forward to taking a picture of the 128 window panes needed for the two coaches. Intriguingly...I can fabricate them fast than to duplicate them in resin.

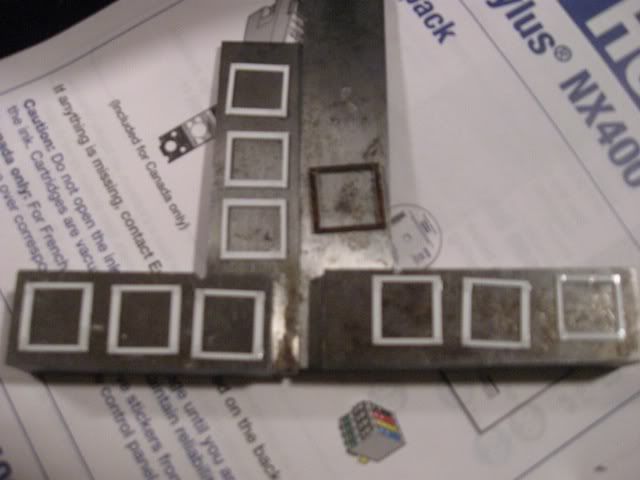
I built one extra pane...just in case I'm not happy with or destroy one of the others.

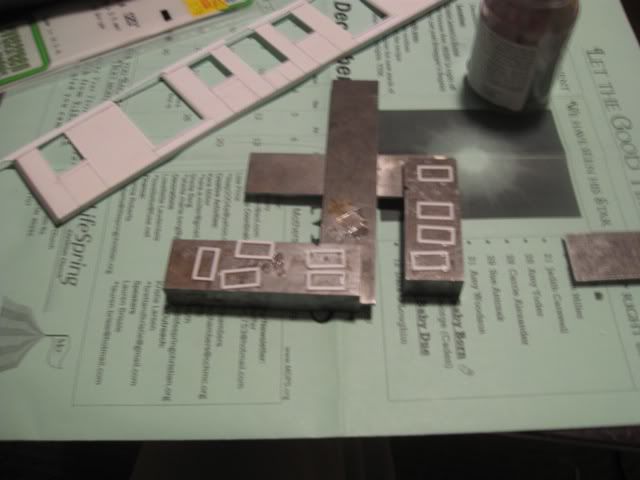
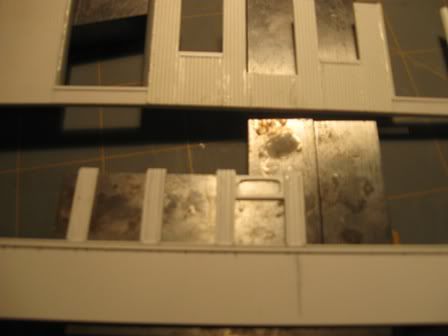
The 10th pane is from the paycar. There is no optical illusion in this picture...it is noticeably large than the panes for #40. It is also of a different construction technique...11 pieces instead of 4, with an internal pocket for the glazing. I'm using a simpler technique this time to ease the installation of the glazing. I kind of like to get some super thin glass from Clover House, but I tend to think that it is too clear for 19th century glass...I feel that clear plastic is more accurate for the time period.

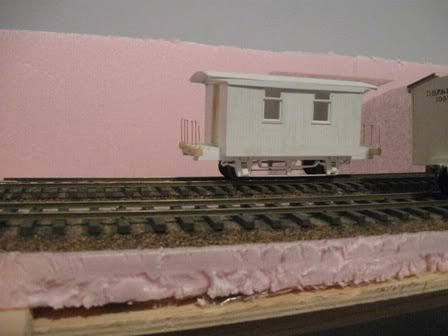
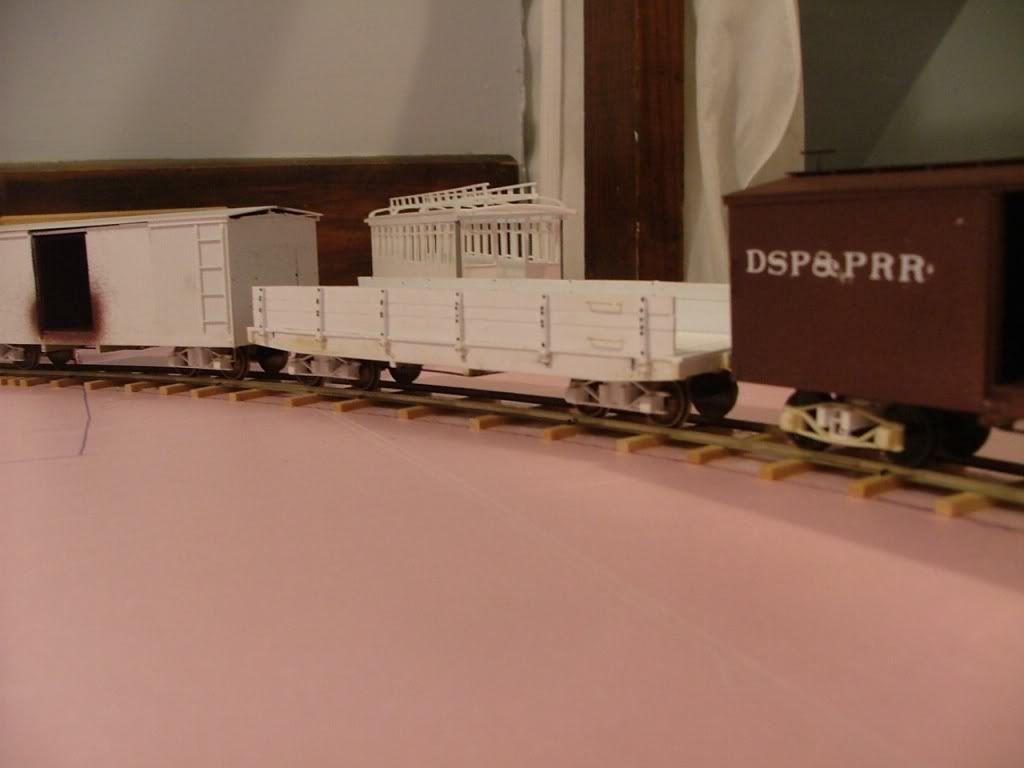
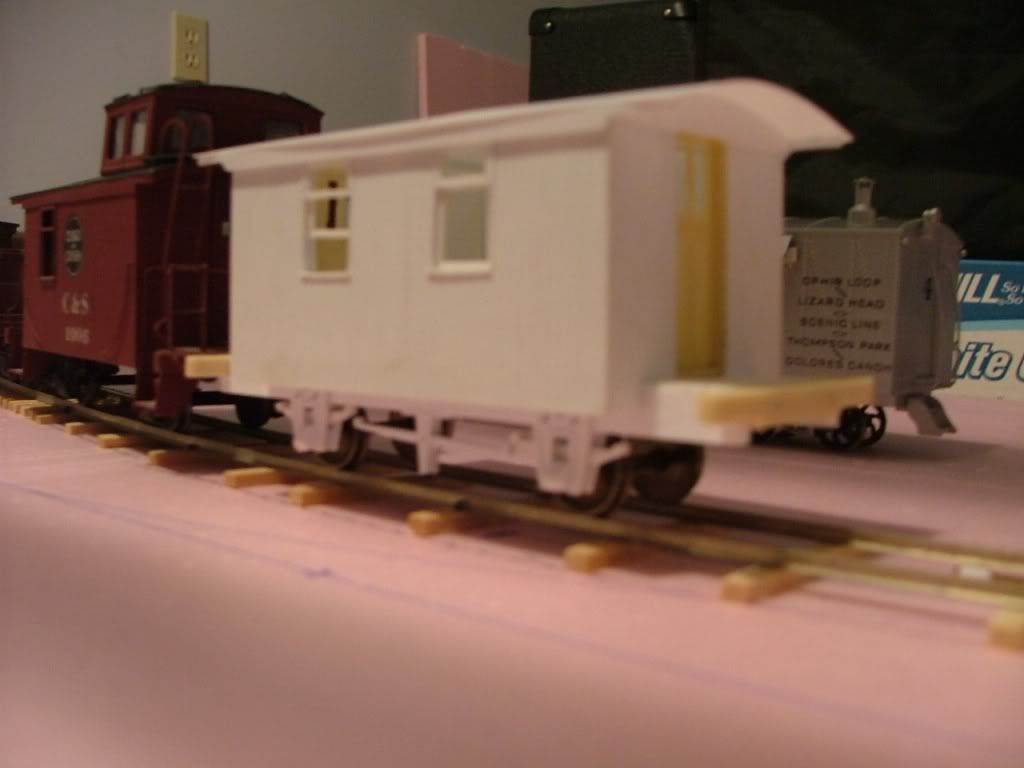
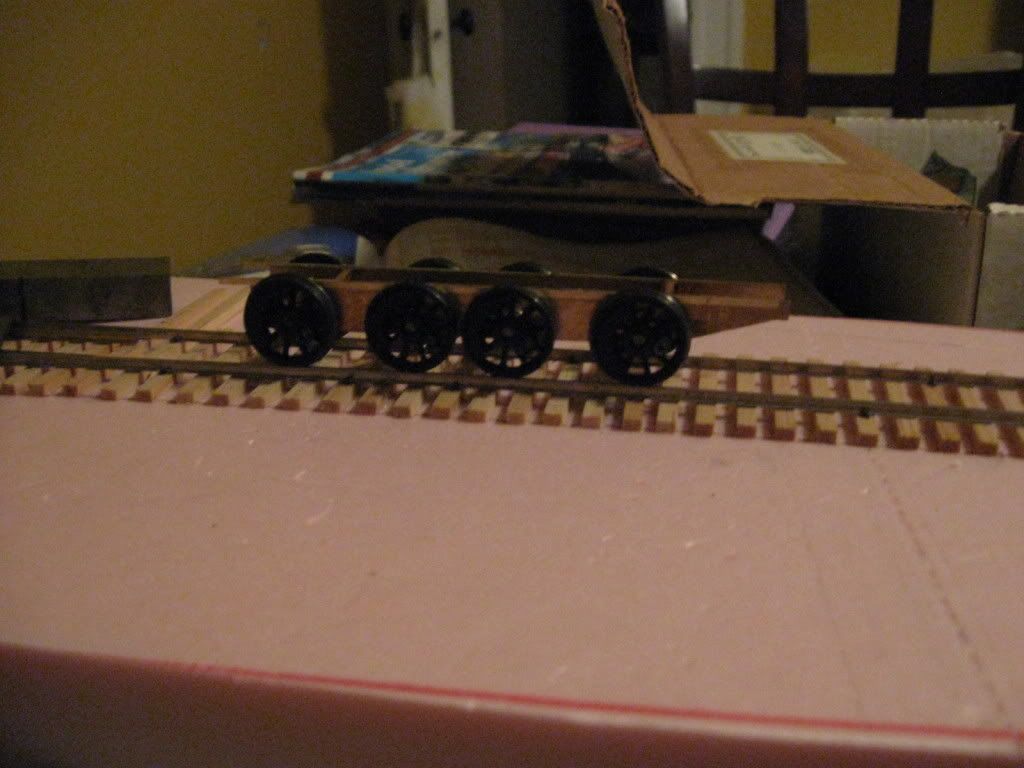
The photo that photobucket didn't like yesterday...

Thursday, December 11, 2008

windows installed

#40 has her windows. I created and installed them while watch da Bears beat the Saints.

Trying to decide on whether or not to light her. I'll have to hide the decoder in some freight if I do. I might just make provisions for lighting, but not actually install a decoder for now.

I need 2" moldings for the people doors...but probably won't get to the hobby shop to fetch them until 2009...we'll see. I'll turn my attention to sheathing the interior of the walls next.

The windows awaiting installation...
The windows are installed, but photobucket doesn't want to let me display that image.

Wednesday, December 10, 2008

40 sides nearing completion

#40s sides are coming along nicely. I spent a pair of hours on the pair of sides. I examined the only known photos of either #40, 41, or 45 (nearly identical in photos...subtle differences in clerestory windows, width, and such). This helped me to determine how I was to cut the fascia. The coaches are awaiting my decision to give them either 6" or 7.5" Fascias (probably 7.5").

I then cut to fit and installed the sides of window frames. My new audio book, Retribution, is quite fascinating. I covers the last year of the Pacific War...but not in the usual sense...I don't really need to know how many shells the Adm Jesse Oldendorf's squadron fired on a particular occasion, but I am interested in the experience of the average Japanese soldier, the British soldier in Burma, and the Chinese civilian in Manchuko. This book gives me the latter.

Here is #40's sides...with only the center door frame, fixed window panes, and interior walls to complete. Then I'll build a pair of ends and slap the body together. I rejoice that this car doesn't have a dropping bullnose roof or end windows. I hate the former and don't care for the latter. I'm really looking forward to all the simple duckbills (child's play compared to some bullnose roofes) on the Colorado Central cars. I've successfully assembled to bullnose roofes before, and there will be plenty more to come :-(

Sunday, December 7, 2008

Passenger car update

Here is the current progress. I spend a couple hours each of the past two nights on these. While the glue was drying last night, I began cutting pieces for the 2-8-0's tender. I need to decide on a number for the 2-8-0...so she'll have a name.

Tuesday, December 2, 2008

Gluing and soldering

I spend this evening (which didn't get started until 8pm) gluing the foam & track to the benchwork. I managed to get slightly more than half of it down. I also wired 1/4 of the layout for DCC using Free-mo standards (14 gauge buss, 18 gauge feeders). Every piece of rail has a lead and no rail joiners are used on each section (solder instead). I'm trying to force myself to get the mainline back into service for when Evan and Addy come to visit. In prep for this, I also created my trestle deck template. I want the full oval to be back in service...and maybe some rudimentery scenery.

Chester got a little too excited seeing the Grandt Line porter make a test run...so had him go downstairs with me. He's a good little model railroader, but he's sometimes too aggressive. His fuzzy paws with claws aren't very good at helping. He came back up when the Goose #4 was making a test run (Goose #4 has sound). Finally, C&S #22 took a pair of Grandt Line stock cars and caboose #1006 over the freshly wired track. #40 is currently in pieces for when I feel like creating molds of the domes.

I'll probably decide some night that it is again time to go back to the passenger cars and knock all 4 sides out. The first two are looking quite nice. I've got to decide if #3 and #5 had 6" or 8" boards above the windows. I guess I should just calulate it from the specs...

Sunday, November 30, 2008

Marching forward

I assembled the window frames and paneling for a second side. I plan to have 4 passenger car sides together within a few days.

I stained the remainder of the stringers for the trestle's deck. Mit mein Neffe und Nichte besuchen im Dezember, bedurft ihr Onkel seine Bruecke abarbeiten.

Tuesday, November 25, 2008

Thankful for Dell

My laptop returned on Monday...various new parts including a new motherboard. Additionally, they're sending me a replacement main battery...something which hasn't worked for months. Everything was covered by my Complete Care warranty.

I have on passenger car side looking very much like it. It is 38'10" long exactly...and will be 40'6" once the corner moldings are added. I need to create the fixed window panes now.


This pile consists of about 200 pieces for the window frames needed to produce two coaches. The rectangle is my assembly jig (which I modified after this picture) to have a uniform window spacing.


Here is one of the upper frames in place.

Here is the side in its current state of development. Above it is the side of baggage car #40. I intend to finish both coaches and the baggage car at the same time. I'll probably use slightly different construction techniques for the other 3 coach sides. If the paycar sides were sitting there, they'd be in between them in length. The cars are 34', 36'2", and 40'6" long.

-------------------------------------------------------------

Lisa and I took Liam to Johnny's Toys yesterday. I picked up a variety of supplies, including styrene tubes for the 2-8-0's cylinders and 1/2" tubes for making brake shoes. I can't bring myself to spend $3 per car to purchase them from a manufacturer...at least not now.

Here are the brake beams for the way car. There are also the four window frame tests in the shot.

Here is the car sitting next to the team track. I sure hope I receive some Link & Pin couplers for Christmas so that I'll be able to pull it. (mom, dad, Lisa, family...hint hint). She'll receive her white paint soon enough. The next one will receive red paint. The South Park had apprx 20 of these cars...the first ten were red and the rest were either white or pale yellow. The early cars had less hand rails and strap steps, they were red, white lettering, and I think they were 14'11". The last red cars had black lettering and were 12'11" long. The next cars were white (or pale yellow) with black lettering, box steps, and more hand rails. The last cars had different lettering, different windows, rounded corner moldings, and I think they were only 12'4" long. No one really knows which ones were the long or short ones...but we do know that some were these lengths because there were a dozen that survived to become C&S cabooses. We know that 72-73ish were 12'11" because one became C&S #1006 and is sitting in Silver Plume, Colorado.

Thursday, November 20, 2008

Laptop still out

My laptop is probably in Memphis today, getting a diagnostic performed on it. I expect the problem to be on the motherboard. If computers had bladders, a glass of water probably wouldn't cause such a problem (or if the circuit boards were coated in epoxy to prevent shorts).

I produced 4 pilot models of the arched upper pane windows for the B&S cars. The windows are 23 5/8 inches wide, I've decided that they should be 12" tall and 1" thick, plus 1/2" for glazing and clearance for the slidinging pane. In O scale, that becomes a window which is 0.4920"x 0.250"x0.020". I've built pilot windows by fabrication of (3) 1x2s and a 1x4, the same but with 1/2x1 reinforcements through the joints, laminating 1/2x2 and 1/2x 4s so as to reinforce the joints, and the last technique was to cut it out of a single piece of sheet styrene. From 6", they all look great...but if they aren't the best that I can reasonably do (which they aren't, before my windows had pockets for removable glazing), I'll notice the imperfections. For me, the best way to form nice arches is to mark off 2" from the edges of the 1x4 top pieces. I then use a round file to for the arches at each corner. I cut and file the center flat. This is how some of the arched windows looked in the 1890s...and I can't really tell how they were arched in the 1870s or 1880s. I'm looking forward to completing the roof. I might try to track down some plans of the Carson & Colorado coaches, kin to these, as they could help with some of the subtle details.

Here is a link to Carson & Colorado #5, built to the same design, and unlike the South Park cars, her roof was never modernized...http://www.oerm.org/pages/GF5.htm
Here previous owner, Ward Kimball, paid for his backyard railroad by creating Disney's renditions of Dumbo, Jiminy Cricket, and the Cheshire Cat. The photos of her are in many respects more useful than the only 2 photos of the car from my time period. The difference being the paint (mine will be Chocolate Brown), the presence of a name plate oval, and a belt rail.

Additionally, I'm rounding up information on South Park passenger cars #1 & #2 and #16-#17,#22-#25. All of these cars were "built" in Wilmington, DE in 1874. #1 were probably kits from Jackson & Sharp which the Halleck Bros of Denver assembled. The others were built by the obscure Bowers & Dure Co. There were two major builders in Wilmington, J&S and Harlan and Hollingsworth. B&D sure seems to have copied their design. I have a 1930s era drawing of the B&D coaches, a drawing of a Har & Hol coach from 1875, and pictures of a J&S car of that time period. The B&D cars came to the South Park through a short lived arrangement with the Santa Fe, but I won't go into that story, Jay Gould, the UP, and such now. The B&D cars and #1 were all 35' long; they were all rebuilt from hooded roofs to bullnose roofs that made the car bodies 8'11" tall. The B&Ds' sides were 6' tall. #1 had the same window pattern as the B&D coaches...the B&D combines & #1 had an 18'6" passenger section with the same number of window locations. The vents and stack arrangement is the same on both. The biggest difference is that #1 was only 7'7" wide while the B&Ds were 8' wide and the windows on #1 were slightly taller. The Har & Hol coach is 35' long, 7'7" wide, 8'8" tall body (6' sides, 2'8" hooded roof), and had 13 windows. All had arched single pane windows (although the center window on the H&H was slightly wider).

So, I'll may be able to make nearly identical roofs for all of these cars, perhaps I'll cast them in resin. If I do that, I know a few people whom I'd like to repay for helping me out with a few things in the past...and maybe sell a couple of them on ebay to cover the cost of the rubber molds and resin. Still, my previous experience with resin has been bad enough to assume this to be a waste...unless I'm building all of the cars and trying a different resin. The key here is that I can easily alter the B&D roof to be 5" narrower for #1.

I haven't mentioned #2 much because little is known of #2. Coach #2, the Denver, was probably identical to #1, the Auraria, upon leaving J&S as a kit. The Halleck brothers then replaced a couple windows with a baggage door and added the partition, just as was done with #23 and #25 in 1884. #2 burned in 1880, and therefore isn't necessary for my future layout (I might build her anyway to go with some of the other 1874 equipment...specifically the boxcars and the 4-4-0).

Only 5 South Park passenger cars were named: Auraria (a then twin city to Denver), Denver, Geneva, Halls Valley, and Leadville. The exception to the numbering only after 1878 were the Pullmans: Plan 73 cars South Park, Bonanza, Leadville, and San Juan (which also burned), and then Plan 73A Pullmans Kenosha and Hortense. Pullmans were sleeping cars for the train from Denver to Gunnison...the service lasted only a few years...but the cars were later converted to coaches, combines, and a business car.

Monday, November 17, 2008

Fried laptop

Yesterday, I unintentionally served a partial glass of water to my laptop. It is now acting fussier than Liam. Oh well. Glad I have complete care. No picture uploads till Dell fixes it (for free!).

I tore out some track work I've been happy with, including a 3-way switch. I soldered together a replacement on PC Board...but will probably create another replacement since the mainline curve is now slightly too sharp.

I've decided to start my passenger train. I have 1 baggage car side assembled, a huge pile of window frame parts and car side parts cut and awaiting assembly on my desk. These will be the Barney & Smith built coaches #3 and #5 of 1878. IIRC, #3 was named the Geneva. Additionally, B&S (of Dayton, OH) also built #4...but she was a slightly different design while #3 & #5 were sisters and kin to 6 Nevada narrow gauge cars...2 of which survive...one thanks to one of Walt Disney's main henchmen, Ward Kimball. Additionally, there is a floor plan from these in Scott Trostel's B&S book. That gives me ample resources to start these two cars. For the record, #4 was the Halls Valley and became C&S #77...serving the citizens of Colorado as a 1st class passenger car for more than 60 years.

So, my passenger train will consist of a baggage-express car and a pair of coaches. After those are completed, I'll want to knock out a pair of Pullmans, a DSP&P built coach (quite different), a B-M-X (Baggage-Mail-Express), and combine #1. I will try to avoid the constant temptation to start on the East Broad Top's Orbisonia which would be a very easy car to build. But this third batch of cars (the paycar was the first batch) are in the distant future. I have a variety of good reasons to have stalled on the Paycar (which isn't a passenger car despite its appearance, it is a rolling bank), and one of them is to have it along with the three passenger cars in the same painting, wiring, and brake work sessions.

A typical South Park passenger train of around 1884 would be pulled by a Cooke mogul and have a baggage car (likely a B-M-X), coach or two, and a Pullman from Denver to Gunnison. Such a train would have quite probably overwhelmed a Mason Bogie at Kenosha and Alpine Passes...but a big Cooke moguls (which could out pull some of the 2-8-0s) would have been fine.

Wednesday, November 12, 2008

Workshop moved, production continues


Hurray for Lisa! She found my missing plans. They included drawings of the Pitkin depot on the DSP&P (which I'd started building months ago), the Almont depot of the D&RG (the coolest depot on the D&RG), a C&S flanger, and D&RG #1. The Almont depot will be a rustic fishing depot opposite the aisle from the Pitkin depot which will sit in between the team track and the wye.

Earlier this week, while Lisa took a nap, I moved the company shops from the kitchen and dining room tables to the loft, adjacent the layout.

I drilled out the rods for the 2-8-0 and it rolls smoothly (a pleasant surprise). smoother than my commercially produced locomotives.


I then checked a pair of domes that I picked up from Precision Scale a few years ago only to determine that they are too small for my 2-8-0. Instead, I'll be making resin duplicates of the domes on my 35yr old Cooke 2-6-0...they are spot on. The smoke stack will be a casting Lisa gave me for my birthday last year (from Coronado). I've had plenty of unhappiness in the past from dealing with alumilite resin...mostly in an ill fated attempt to duplicate truck side frames (it is faster, easier, and more reliable to just form them from styrene). These should be easier...and I don't need as many.


I also added the weight and deck to my 26' 1878 flat car. This, along with the assembled 27' coal car, were built with a hidden pocket for the weight. This caused some slight problems and I won't be doing this again. Eliminating the intermediate sills and putting the weights in their place is better. I'll use a bit of weathering to tone down the rainbow look of the deck.


Here's the piles of ready to use, stained but not weathered, and distressed but not stained lumber for the trestle.

Friday, November 7, 2008

2-8-0 progress


After the better part of a week with no appreciable progress, I've resumed work.

I cut out a piece of 0.020" thick styrene for the boiler. I then wrapped it around a slightly undersized metal broom stick. I used at least a dozen rubber bands to keep it tight. I then submerged it in boiling water. Boiling water softens styrene but doesn't melt it. After I removed it from the water I cooled it...just to make sure I didn't ruin it while removing it. Once it was off, I cleaned up the ends and glued them together. I added a piece of 0.010"x0.060" stryene to reinforce the seem.

Photobucket

Next I produced a few stiffeners from styrene sheet using a homemade compass scriber. I glued them into place.

Photobucket

With the boiler's glue drying (in my pin vise to keep it round), I started on the rods. First I made a test run with styrene...and learned that the bearings need to be 0.030" oversized. I then cut them out from 0.025" brass sheet using my trusty vice and jeweler's saw. I located the crankpin holes with my caliper and used my auto-center punch (worth its weight in gold).

Photobucket

While verifying that the frame had the proper dimensions, I learned that I'd messed up a little. The drivers came from a Broadway Limited Imports On30 2-8-0. I'd re-gauged them with a gear puller, but chose to disregard its rods due to the spacing being off. For some reason, BLI decided that instead of the proper 4'2"-3'1"-4'1" driver spacing, they made theirs something along the lines of 4'-3'4"-4' (my Cooke 2-8-0 should be 4'1"-3'2"-4'1"). 2" off of correct for a Cooke doesn't seem like much, but the center wheels are supposed to nearly touch...and it really looks bad to me if they don't. My mistake was that I'd somehow managed to duplicate BLI's spacing on the center drivers. I rectified this and made a few slight changes to bring it within +/-0.002" of being correct.

Photobucket

Photobucket

Thursday, October 30, 2008

The newest model railroader


He arrived at 1:28am this morning. This is his first experience with trains...the Colorado Central's Georgetown Loop. The photo is William Henry Jackson's majestic exposure from the day prior to the start of regular operations. Today, the line has been rebuilt and is a steam operated tourist line...with an 1884 Cooke mogul which traversed the loop prior to WW2.

Here's a view of that picture...
http://www.midcontinent.org/rollingstock/CandS/dsp-passenger/images/dsp050_gtloop_1884lrg.jpg

The kid and mom are bonding now.

Sunday, October 26, 2008

All in a Saturday & Sunday-s work

I spent most of the non-church time this weekend working on four cars...a flat car, a lime car, a stock car, and the waycar.

I added a bunch of hardware that was fabricated from stryene and brass. I also painted the stock car and the lime car.

The time went fast, for Saturday I listened to the first 8 cds of the book 1776 (I love audio books). 1776 is principly a narative of the American Revolution from late 1775 through the end of 1776 as Generals Washington, Howe, Green, Knox, Lee, and Clinton saw it. I also slipped in a cd of Adams vs. Jefferson which is regarding the election of 1800. I really enjoy understanding what information the leaders have and how they act on it.

I started this flat car a long time ago. I added the brake gear today...some of which is invisible in this image. The prototype was built in 1878 with hardware from Barney & Smith.

This stock car received a ton of work: doors were fabricated & installed, the corner braces were added with poling pockets (round things), the grab irons underneath were added, all the door hardware (which is tough to fabricate), the end blocks, and a few odds and ends. I also, obviously, painted her Tuscan Red.

The prototype was, well, I can't quite remember off the top of my head, but I want to say 1880. She was probably assembled in the South Park's or UP's shops with hardware from the Litchfield Car Co (as her hardware appeared to be the same as the 400 litchfield cars that the road had).

This is a lime car. Since lime doesn't like rain, it was covered. It was built by the Colorado Central around 1880. It is the shortest freight car I've built so far, 24'. A nice car.

the waycar is tough to photograph due to being white. I built additional parts to the running gear (suspension) and completed the end hand rails. All the difficult steps are now complete.

Saturday, October 25, 2008

Thomas the Tank Engine

So, the kid is due in less than two weeks. The kid is going to need some trains to watch and later to play with. My On3 trains are a bit too delicate to turn over to even a junior high kid, and will therefore only be in the watch category for a long time.

Enter Thomas the Tank Engine.

Thomas is great because the appeal is to both boys and girls, and he gives a natural transition to more mature rail fanning. The littlest of kids want personality. Then they want fast & big trains but don't appreciate fine details (which they destroy). Then finally, as adults, the begin to appreciate the hobby more for its artistic and craftsman qualities: model railroading is all about creating a small, animated sculpture. Finely detailed scenes, smooth running trains, and creating optical illusions are the enjoyable parts.

The plan is to build a 4'x8' layout for Thomas the Tank Engine. It will be made out of foam so that it is light weight and portable. It will be based on the Rev. Awdry's original layout, Ffarquhay. The mainline will be an oval for Gordon and the other "big" engines; Thomas's branch line will split off at the main station and follow an "S" up to the town of Ffarquhay. Everything on the layout will be British. Last night I did a little research and determined that Bachmann's electric Thomas is British OO scale. This required a little effort because it is marketed as HO/OO. Since HO and OO are different scales, it couldn't be both (I can't be 6'2" tall and 6'6" tall at the same time!). After a serious search, I determined it to be British OO which is 1:76 scale (HO is 1:87.1) and uses HO track. Therefore, the buildings will be 1/76th full size rather than 1:87.1. The kid will also be able to take advantage of the 1:72 scale figures and model cars for playing with the layout. A side benefit of this is that the OO scale train I picked up in York last year, a medium sized British Rail locomotive with 5 freight cars, will have a place to run.

Today my plans are to make progress on my DSP&P stock car and waycar. It is almost a crime that I haven't completed my waycar since it is both close and I have dry transfers to letter it.

There are many words for the conductor's car:
-caboose
-cabeese (plural)
-cabooses (plural)
-waycar
-hack
-bobber
-brake van (British)
-guard's van (British)
-crummy
-cabin car
-buggy
etc...

Friday, October 24, 2008

The Begining

In the begining, God created the Heavens and the Earth. He later created James Watt for the purpose of making the South Park Line possible. The South Park was built, largely in part, with the worst engineering practices of the day. This was made worse after Jay Gould performed a hostile takeover and turned it over to his Union Pacifc whom implemented worst management practices.

The South Park, like many other Colorado railroads, was built as an outgrowth of the hole digging movement of late 19th century Colorado. The railroads helped facilitate the digging of holes in the ground by providing links with cities such as Denver. By the end of the 19th century, most people had figured out that the digging of holes in the ground wasn't a very profitable business, and few new railroads were built. A (or perhaps THE) major reason for the hole digging bubble was that the US government subsidized the digging of holes in the ground until 1893, but the UP's WMPs of the South Park Line had already driven the hole digging business to its competitors (namely, the evil Denver & Rio Grande).

I am fascinated by this period in history. Many of the cost cutting practices of the railroads built in Colorado make them all the more interesting. The most noticeable cost cutting practice was to build the railroads according to narrow gauge practices. Nearly every railroad you've ever seen has rails 4'8.5" apart (your car's wheels are the same width as well); most Colorado railroads were built to a 3' gauge instead. While their was a flawed rational advanced by Robert Fairlie to promote it, it did have the advantage of being far cheaper to construct a 3' gauge railroad through the mountains (with all the trestles, tunnels, and rock shelves) than a standard gauge railroad. In the long run, the most profitable lines were rebuilt to standard gauge since it was kind of difficult to send their cars with 3' gauge wheels over 4'8.5" gauge rails.

The Colorado narrow gauge movement was started by General Palmer whom sought to connect Denver to the Rio Grande with his Denver & Rio Grande, and then on to Mexico City. His D&RG got as far as Santa Fe, NM...he also started a Mexican company that did connect Mexico City to the Rio Grande River. His inspiration was the 1'11.5" gauge Festiniog Railway in Wales. His D&RG was caught in a variety of railroad wars (which did involve gunmen & courts) and became an East-West line instead of a North-South. This brought it into conflict with the South Park Line...racing to get to Gunnison, CO and competing over the lucartive Leadville business.

The South Park Line, started in 1874, connected Denver to Como (which is in the South Park), and then had a line going south to Gunnison with a branch to Baldwin and a line crossing the continental divide twice to reach Leadville. The railroad's full name, the Denver, South Park, & Pacific, reveals the original intent of getting to the Pacific Ocean...but never made it out of Colorado. What was achieved, was one of the most scenic lines ever constructed anywhere in the world and a lot of dramatic photography preserved for posterity. at the close of the 19th century, the South Park was merged with its sister company, the Colorado Central, into the Colorado & Southern...and then purchased by the Burlington Route. The last piece of the C&Sng was a section of the South Park's Leadville line which was converted to standard gauge in 1943. 5 narrow gauge locomotives survive from the C&S (and 2 standard gauge ones). Two locomotives started off as South Park engines and the other three arrived later. A few South Park passenger cars survive, and a 4 mile section of the Colorado Central is now a tourist railroad: the Georgetown Loop.

I model the South Park Line in O scale....1:48th the real size...On3. I built my models from scale lumber, plastic, and brass. I use plans, carefully study pictures, and read to build accurate models. My layout occupies an 8'x15' space in our loft. The gracious Lady York has granted trackage rights for a yards to pierce the other half of the loft, but only after I've made appreciable progress on the current portion. This blog is going to be my railroad diary. I will fill it with pictures and thoughts on the construction process. It will also include my musings on other topics of interest to me such as the London, Brighton, and South Coast Railway.

This is my trackplan. There are three bridges: two small ones and one large trestle. It is an oval with three sidings. I'll probably have two stations. The first station is near the top left, a green rectangle. I am building a model of the Pitkin, CO depot for here. The second one probably be over by the small bridge at the bottom...based on the Almont, CO depot (on the evil D&RG's Crested Butte branch). When the mainline hits the curved trestle, the stream will hit a waterfall. I'd love to include a bit of the 2' gauge Gilpin Tramway, but I don't see a good way to do so.


Here is the current progess:

I'm also in the progress of painting & lettering one of the venerable South Park Cooke moguls:

And I have an assortment of scratch built pieces of rolling stock at varying stages of completion:

Additionally, there are a pair of flat cars, a second gondola, a lime car, and a baggage car at varying degrees of completion. There are also 9 cars and 4 locomotives that were not scratch built and are not pictured here, but polish my high iron.

Last night I worked on the brass hand rails for the waycar (South Park speak for caboose). They were made from 0.015" brass rod which was flatted for the tops.


A couple nights ago I soldered together the frame for my future 1883 Cooke 2-8-0. Her appearance will be very similar to her little sisters, the Cooke 2-6-0s. The South Park would use 4 of these to drag a 15 car coal train over Alpine Pass.