Saturday, January 24, 2009

The C&S Coal Car diversion/Train show


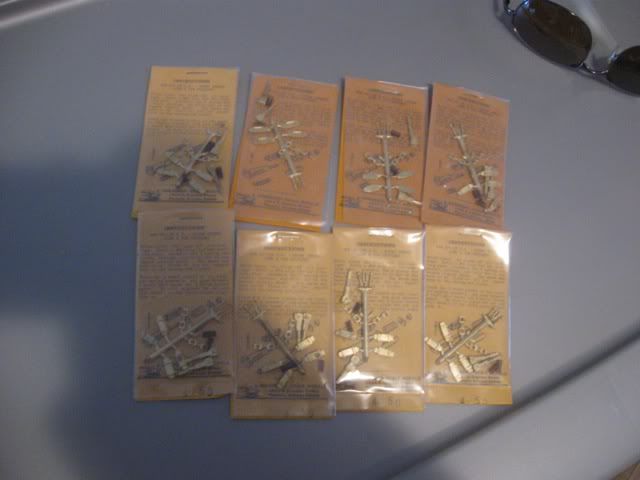
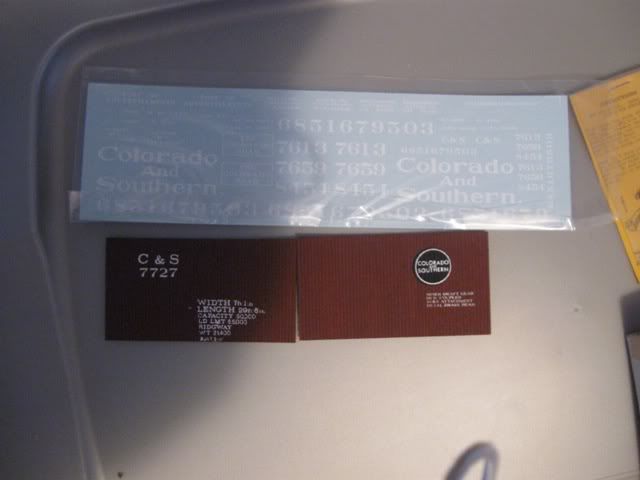
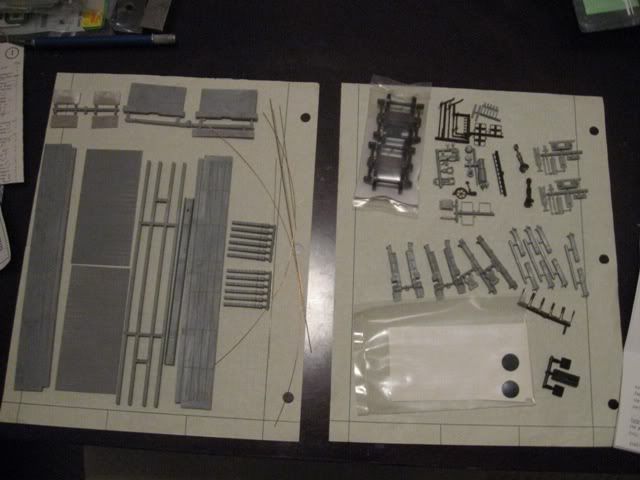
On Friday evening, I decided to build the C&S Type 3 Coal Car kit. What a great ebay find! I'm keeping an eye out for more.


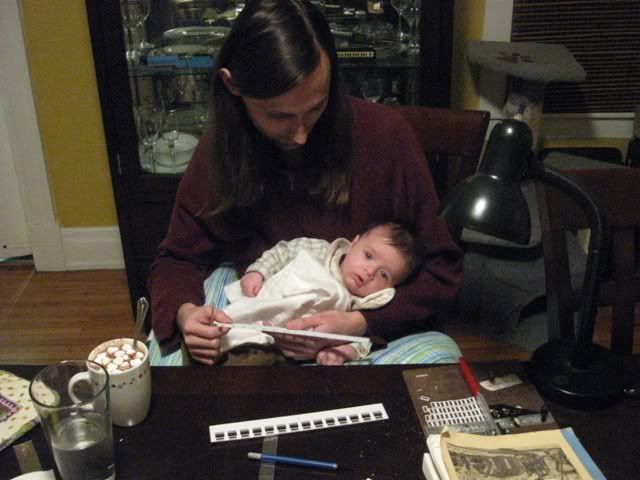
I decided to work in Liam's room as mommy was working with him in there. The result was me sitting on the floor to build this under low light and on a surface that temporarily stole a few of my parts (darn rub gnomes!)

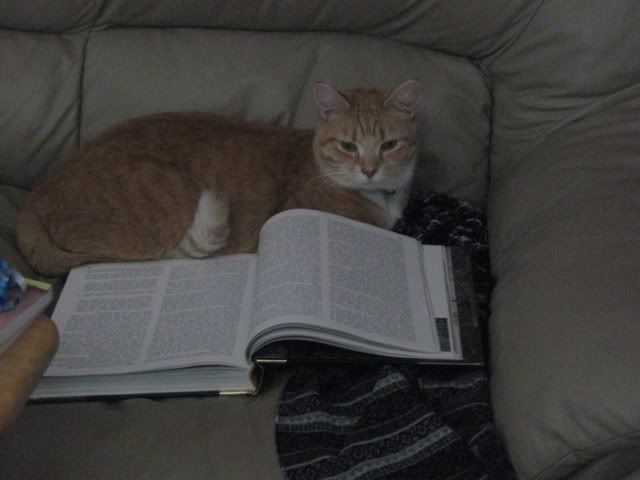
The entire family was there. Chester was supposed to be my spotter while lifting heavy parts, and Pumpkin was supposed to be our supervisor...he didn't give many instructions.

I ventured from the instructions at the start by drilling #78 holes everywhere on the car body. I then cleaned up the big pieces and chose to assemble the I-beam steel underframe first. You only need to drill out one of the two holes in each bolster...so long as you drill out the correct one.
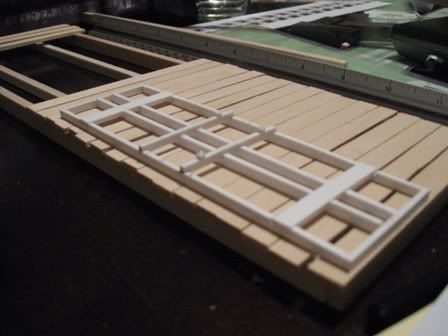
A bolster, the end of the frame, the pad that goes on the bolster, and a completed assembly sitting on the I-beam.

Chester didn't do his job very well. He fell asleep!

I then went back to the directions to assemble the box.
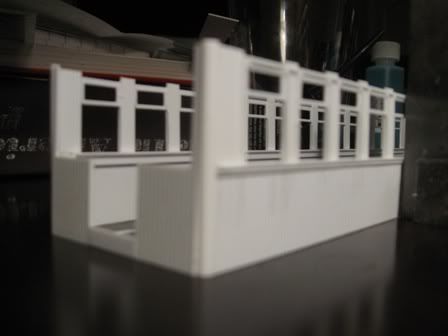
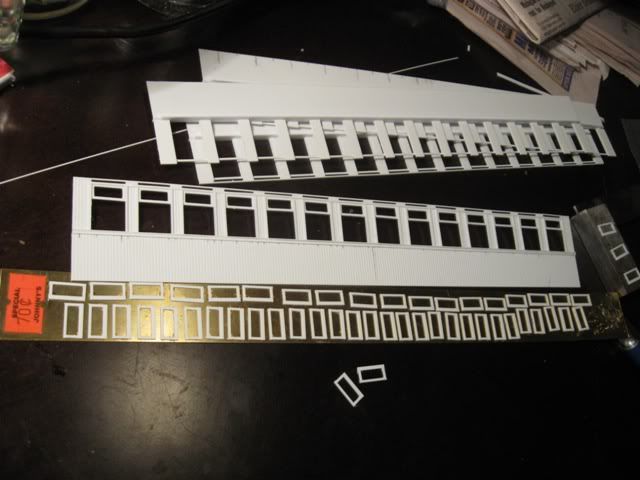
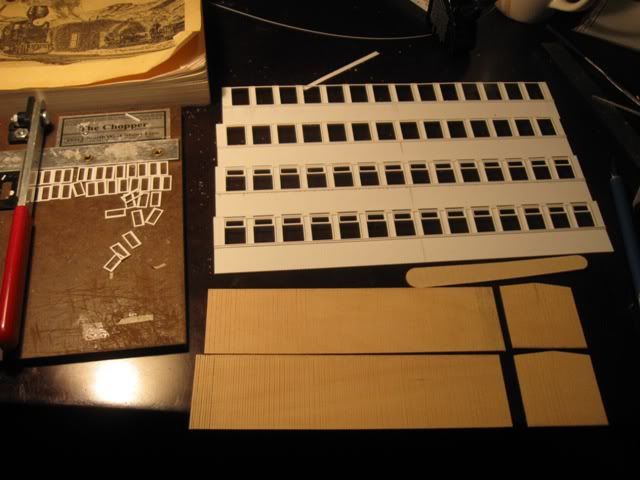
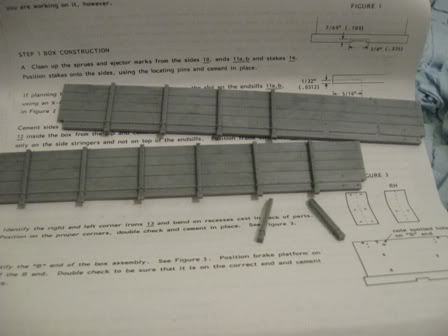
Adding the stakes

Corner reinforcements

Unfortunately, I could decide whether to square the sills or the sides. (dumb) I squared the sides instead of the sills. I then dropped the floor into place...to make certain that it was square. I realized my mistake when the wooden frame didn't quite fit...it was 1" scale too short. I quickly seperated the parts that were drying and re-glued them...still squaring the corners. Unfortunately, I then had to help with the dishes and the parts didn't dry quite right...too long.

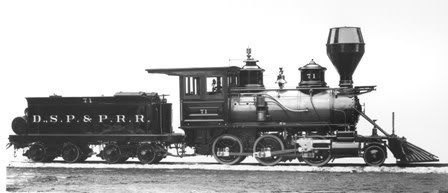
I then set about to assemble the steel underframe (SUF) when I got back. I didn't follow the directions so that I could photograph it seperate from the car. These cars were quite modern freight cars when completed around 1910. They consisted of wood boxes similar to the Type 1 and Type 2 coal cars, which were patterned off of some coal cars inherited from the UPD&G (they were so new that they arrived painted for C&S instead of UPD&G (IIRC)...they were built by St. Charles/AC&F). The principle difference was that they were equiped with Bettendorf hardware like the Type 2 cars...and SUFs instead of trussrods like the 1s and 2s. The only surviving C&S Coal Car is Type 1 car #4319 in Black Hawk, Co. For more info, see Harry Brunk's Up Clear Creek for the C&S stuff or Run Rudnick's UPD&G/DL&G modeling guide for the story of the first cars.


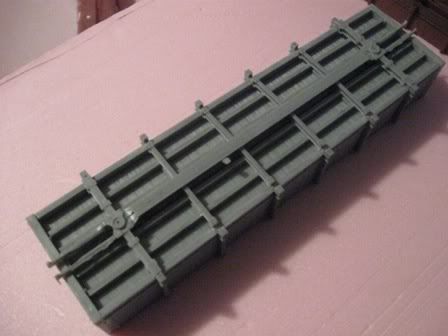
It didn't fit...it was too wide. The problem was that by not squaring the sills, the sides were around 1/2-1" scale too narrow. Many platform cars (flats, gons, etc) had end sills which extended beyond the side sills, so it didn't occur to me before this point that they should be flush with the sides (square the sills, not the sides). I fixed it by filing the end of each crossmember of the underframe, and it now fits fine.
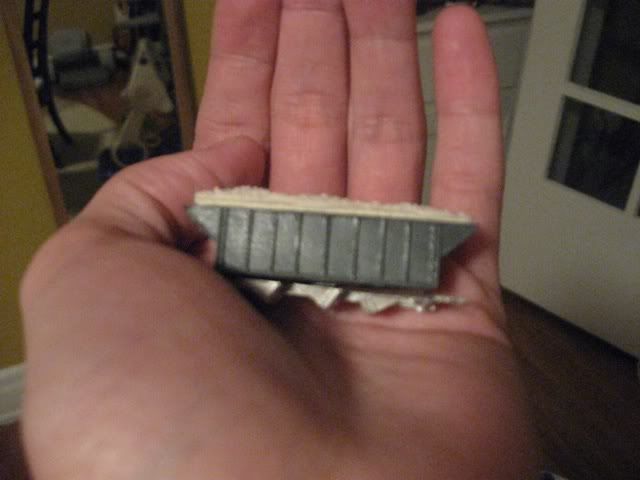
It now is awaiting the brake rigging.

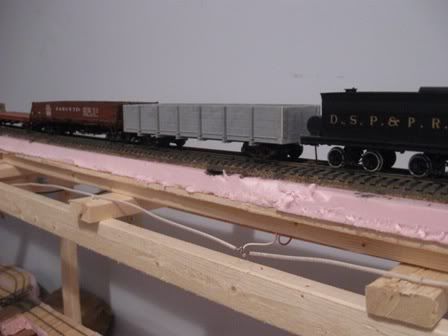
But it looks rather nice as is!

Total time expended: 2hr 15min...30min of which was probably fixing my mistake with the body.

I also spent 2.5hrs on a Life Life P2K stock car kit in HO on Friday...it is assembled...the time would have been better spent on my On3 stuff...any On3 stuff...good sign that On3 is still the scale for me!

Today I went to my LHS, Johnny's Toys for their annual train show. There were a few layouts there: an HO layout with L&N stuff, an On30 layout that was quite nice, a large scale layout, a couple live steamers (1/8th full size and 1/12th full size), an H0e amusement park layout, an S gauge layout, and the store's fine HO layout (but with steam running for the show!).

I did a bit of bargain shopping:
-B-man large scale track: 24 curves and 8 straights for $44 total (the first track for Liam's future Fn3 trains...I was considering brass track...but this was too cheap to pass up!)
-A Thomas the Tank engine OO set for Liam....$25
-An OO Thomas freight car for $6
-some detail parts that were cheap
-styrene for the Fn3 locomotive
-An MRC Prodigy Express DCC system for $90 (for me...I wanted an NCE Powercab...but this was too cheap to pass up...this and a set of sprung HO trucks for $2 were the only things for me)

Thursday, January 22, 2009

The pictorial supplement to the quick update...

Liam and what will become his locomotive...
And what it will become...
Only lettered up as Colorado Central #14. The boiler jacket will be a metallic light blue, the cab will look like varnished wood. The cab windows will be painted like a light colored wood. The tender, frame, domes, and other misc parts will be black. The lettering will be gold leaf with red drop shadows.

Here's the motor for the 2-8-0...

The window making party...
And that's it for now. I will continue to focus on the passenger cars...and let the large scale and other On3 projects simmer. I might snap an HO P2k stock car kit together ($5 at my LHS), but that wouldn't take much time...certainly not on the same scale as this stuff.

A quick update

In the past couple of days, three packages have arrived. First, a Grandt Line On3 gondola arrived. It totaled $19.80 on ebay. Then today, I received two packages: the long awaited motor for my 2-8-0 project and a Bachmann Big Hauler chassis for Liam's F scale "trainset".

The Chassis isn't quite as complete as I was expecting (the bottom panel is missing), but that doesn't bother me. I sort of suspect that whomever sold it to me, replaced it with a Barry's Big Trains chassis. I don't care. It was cheaper than getting a full 4-6-0...and I would have junked the rest of it anyway. My goal is to turn it into a Colorado Central mogul by either Christmas or possibly even by Liam's birthday.

Now that the motor for the 2-8-0 has arrived, I ought to get back to work on it. I need to figure out what sort of gear tower to get. It has a gearhead, so I'll probably get some sort of 1:1 ratio gear tower such as that made by Grandt Line and Precision Scale. After the mechanism is performing flawlessly, I'll continue on with the rest of the locomotive.

The Grandt Line gon was cheap and I've long wanted one. The price was right and it goes with the 4 car C&S freight train in service already. I plan on adding a boxcar and reefer this year...which will turn it into a 7 car freight train: 2 stock, 1 flat, 1 coal car (gon), 1 boxcar, 1 reefer, and 1 caboose.

Sunday, January 11, 2009

"arched windows"

Supposedly, the fixed window panes on these cars were arched. But from studying the pictures of Ward Kimball's car, his aren't. Instead, they have little quarter circles which could easily be mistaken for arched windows in the fuzzy details of pictures from 115-130yrs ago on which I've based these models. Their are no commercial plans for these cars...just miscellaneous info, much of which comes from folio sheets (basic info such as length, width, height) that are dated from when they were nearly 40 years old.

Since Ward's car still has the original style roof and is probably from the same plan, I'll guess that the windows were the same...at least in dimensions and details. One major difference is that I believe the DSP&P cars had end windows...the C&C/SP cars did not. I believe the South Park cars had them because I can see belt rails on one end of the ruins of #3 which Todd Hackett photographed in 2002...thank you Todd! (I doubt you'll ever read this, but your pictures have been invaluable to me!) Belt rails were frequently visible on wooden passenger cars...they were a cosmetic feature which covered the framing under the windows (and at the tops of the side trusswork). They look like armrests. If windows were sheathed over, the belt rail usually remains...but if no window ever existed, their is usually (or never) a belt rail. Ward's car doesn't have belt rails at the ends.

My sides are complete on the exteriors, minus the fascia which needs some styrene I've run out of and the name plate ovals. I've started the ends...and I'll probably go with rounded top doors as #3 had at the end of its life...while Ward's has square tops.


Yesterday, I visited Johnny's to see if they had any Thomas OO stuff on scale for Liam. They had an Emily set on sale...and I thought a bit about it (Emily is the Stirling Single of 1870...it has a single 8' or so driving wheel). I ultimately decided against it...for now at least. Last year they had an excellent special on Thomas stuff at this time. I walked away with $10 or so of stripwood and 3/32" thick "plywood" for starting Liam's large scale "trainset".

Here is a picture of a real Stirling Single which I took 2 years ago in England:


I cut some of the "plywood" into deck planking for Liam's first flat car, as well as cutting a few sills. This photo shows the scale of it alongside an On3 frame of the same car that I built 6 months ago. They are both models of the Colorado Central's 1872 23' long, 7' wide flat cars. Liam's trainset will have a Colorado Central 0-6-0 and a series of 1870s Colorado Central freight cars that are designed to survive his childhood (as will be the engine!). Lisa thinks the flat car looks huge, it is 20.3 times smaller than the real thing, while my On3 car is 48x smaller than the real thing.

Here are a few links to some Colorado Central goodies on the DPL WHC site...
Sometimes you have to refresh it several times to get the pictures to load...
http://photoswest.org/cgi-bin/imager?20102201+CHS.J2201
http://photoswest.org/cgi-bin/imager?00301084+WHJ-1084
http://photoswest.org/cgi-bin/imager?00130075+C-75
http://photoswest.org/cgi-bin/imager?00130084+C-84
http://photoswest.org/cgi-bin/imager?00130097+C-97

The Colorado Central is great because the cars were dinky. The early Rio Grande is great for the same reason...small cars and small engines look great on 2' radius LGB track. I plan to build him 2-4 locomotives...a Colorado Central 0-6-0, a Colorado Central 2-6-0 (which is actually bigger than many 2-8-0s) and possibly Rio Grande 2-4-0 and a dinky Rio Grande 2-6-0 (close in size to the 0-6-0). Some of the Rio Grande cars were only 14' and 17' long!?!

Monday, January 5, 2009

Continuing the sides


I caught Mr. Pumpkin reading the Rainbow Route. Every once in a while, I'll catch him reading a railroad book. He always has excellent taste in books: The Mineral Belt Vol. II, Mac Poor, etc. Before him, I didn't know that cats were literate.


I've installed the 28 panes needed for two of the car sides. I still intend to add a few trim pieces on the backsides. I'll then need to make the ovals, the fascias, and the interior sheathing.

Here are the panes, as the glue dried. 14 have been installed at this point. Installation involves trimming and sanding off any extra glue, and sanding to fit in place.

All of the panes have been prepped for assembly, and 28 installed. Also pictured are the car sides for a 26' Litchfield boxcar which I hand scribed back on my birthday before Christmas.

The South Park used 5" boards with a groove down the middle. The "edge" scribes are scribed deeper than the "groove" scribes, this in person gives the same appearance as the siding seen in close ups of the actual cars.

The little man spent part of the time on my lap as I prepped the windows...until he needed his diaper changed.

I'm currently fighting the urge to work on freight cars...specifically freight car patterns for trying out my new resin. I will definitely be casting the Bowers, Dure & Co cars...as there were 6 of them. 2 of these were rebuilt into baggage cars in 1884. In C&S years, they became backup cars...and had been rebuilt with bullnose roofs. I have plans for the later configuration, and am preparing plans for their earlier roofs (similar to the first J&S cars for the Rio Grande). I plan to cast parts for 4-6 coaches and 2-3 combines. Because the moulds will be good for 40+ coaches and 20+ combines, I'm inclined to sell the extras as I know that a few other South Park modelers would like to add these cars...and they are of a classic early design.

Saturday, January 3, 2009

window production

I'm cranking out the windows for the coaches. I've cut around 250 pieces for the fixed panes and assembled 1/4 of them. This is currently around 1hr-1.25hrs of cutting and gluing. I spend far more time deciding what to do than I spend actually doing it. The key to working quickly is to set up the chopper accurately and to make consistent cuts.

Thursday, January 1, 2009

New Years

I haven't been able to get much done over the past 3 weeks due to work, Christmas, and family.

I received a few items to help me with workin' on the railroad. I'll probably get a nice tools (or set of tools) with my Birthday & Christmas gift money (perhaps that micro mill I've been wanting to get).

There were a variety of gifts, such as the ever in demand On3 wheelsets and DSP&P decals. Here are a few notable items:

Smooth Cast resin. With a slightly longer (in practice) pot time than the alumilite I have previously used, and much lower viscosity, I'm hoping it is actually of value (unlike alumilite).

Coronado's DSP&P Link & Pin couplers. 8 pairs of these was great. They are always in short supply, so I was really happy to receive these.


1905 C&S boxcar lettering. Last year I received a pair of extremely disappointing Ye Olde Huff'n Puff kits...a Tiffany Reefer and a C&S boxcar. I tried to salvage the original, pathetic paint & lettering job on the Tiffany (would you believe that despite what their directions said, Floquil Reefer White didn't match the car's paint) ...I then either severly modified our outright modified every detail part in the kit...and sawed all the parts down to the correct dimensions. The boxcar's dimensions are closer, but its lettering job is the single worst job I've ever seen on a car...including hand lettered cars. Not only is the placement and quality of the lettering terrible, some of it is wrong! (such as the car having been last shopped in Ridgeway...Ridgeway? It is a C&S car, not a RGS car!?!) So I'll be striping the paint off and applying these new decals.


For Christmas, Lisa picked up a passenger car decoder and a pair of Nn3 car kits for me. I'm not switching to Nn3, but I've wanted to build a kit for a while. She gave me a C&S caboose and an EBT hopper. If I decide to get an EBT 2-8-2, I'll letter the bobber to one of the pre-8wheel EBT cabeese. Unfortunately, adding a locomotive will be in the distant future since I won't make much budget available for non-On3 items.Nn3, HOn3, and On3. HOn3 uses Z-scale track and wheels. The Nn3 car is a model of C&S #1002. The HOn3 is a model of the 1005, and the On3 model is of 1006. I've removed all the flash from the 1002 and partially preped the frame.