Monday, December 7, 2009

NMRA meeting this Sunday

Last year, I attended my first NMRA meeting. It wasn't a particularly enjoyable time...in part because the table where I sat was filled with people whom were unwilling to engage in conversation. But this week, I will go back for my second meeting as I met enough interesting people through the Mini-Bunch to have a better time.

The monthly contests are stock cars and photos of steam. I'll be entering my favorite photo from Jenbach, AT into the photo contest...and I'm working on completing my DSP&P stock car for that contest.

Accordingly, I've started two pair of early DSP&P trucks. One pair will be for this car, and the other will go under one of my other cars. Since this is a nicely executed car, I'm making a point to detail the trucks. The wooden transoms are scribed on all four sides as well as the ends. I'll add the NBWs once I have the side frames together; journal lids after it is complete. I'll design some sort of faux spring plank so that it looks right, but isn't fully functional. This type of truck is the most difficult freight car trucks that I've built...with at least 35 pieces per truck, excluding the bolster pad and augmentables.

Photobucket
These are what I did last night. They are the transoms and spacers. They are a scale 12" tall and 16" wide, with a transom length of 5'2" IIRC...these correspond to 1/4" x 1/3" x ~1 1/6".

Saturday, November 21, 2009

A lettered waycar

Today was the Mini-Bunch fall meet. It was my first Mini-Bunch event. I had a good time and greatly enjoyed chatting with numerous likewise "narrow" minded individuals. Last year, I just missed the fall meet and couldn't make the spring meet.

Unfortunately, I forgot my camera. There were several nice models in the contest room, as well as some cool layouts. I had debated which car I ought to paint/letter and bring, and I settled on the incomplete baggage car and waycar. I was really almost too embarrassed by the waycar to take it...its execution is now well below my modeling level. Regardless,I hurriedly painted her white on Friday morning and then hit the underside with a wood shade and black on friday evening...single coats of each. I cut squares of silk span approx 2'x 2' and applied them to a coat of gray on the roof to depict a canvas roof. I finished applying the first layer of dry transfers and sealing them after 3am. I then woke up at 9am and applied the second layer and sealing them. I would never dream of doing this with one of my "good" models, but hey, I'm already disappointed with this car...so all I could ruin was a good pair of dry transfers! At the last minute, I tossed the lime car into the box as a space holder to keep the way car from rolling around...and I ended up setting it up on the table as well. After the event, we visited a fabulous HO Southern layout.

Here are some photos of the lettered way car and the 34' roofs: 2 good resin roofs, the warped roof, and the master. The resin copies are actually stiffer and heavier than the styrene master.

Photobucket

Photobucket
Yep, I smudged the paint a little and I had poor color separation.

Photobucket
What an ugly paint job underneath! It matches the crooked truss rods! I am thoroughly looking forward to my next way car...I'll do that one right. This one will be just fine as a filler car on my future roster.

Photobucket
Roofs lined up!

Photobucket
I also got around to installing all of the door guides.

Photobucket

It was really a lot of fun to take models to the show. Sure, winning would have been great, but the models were great conversation starters. I definitely will take models to all future conventions and events...even if I don't have a competitive piece, because it made the event more fun than had I not brought any.

Here's the Mini-Bunch page: http://www.narrowtracks.com/minibunch/

Thursday, November 19, 2009

Returning to work

I've been quite busy over the past month with defending my MS thesis. I've reached the land of 10,000 corrections...having passed the defense. Therefore, I haven't gotten around to posting. I've done a few things here and there:

-patterns for the sides of an Oahu Railway coach
-experimenting with painting techniques for simulating unpainted wood (using $0.50 acrylics)
-researching South Park passenger cars
-researching the Oahu Railway freight roster

My big project the today was finishing up the mold for, and casting my first, resin roof. I've not bothered to start any of the other roofs, for if there are any lessons I need to incorporate into them...it is best to learn them before starting.

The next two roofs are for the OR&L clerestory roofed cars and the 40'6" Barney & Smith roof for coaches #3 & #5, as well as the cars that served on the Carson & Colorado, SPng, Nevada County Narrow Gauge, as well as another road in Pennsylvania. It is important to note that while coaches #3 & #5 both made it onto the C&S roster, they were extensively rebuilt and so the 1920's version of the C&S cars would require a special roof.

In my experience, the first casting reveals any problems that I have with either a) the mold or b) my technique. Accordingly, I didn't wait long enough for it to harden since I wanted to see if it worked (this caused it to be warped). I adjusted my technique and another has been hardening for an hour.

Photobucket

Comparison shots with the master:

Photobucket

Photobucket

That roof will probably be used as part of a wreck or abandoned car scene.

Monday, October 12, 2009

Finished roof

I've been really busy with work/school. Things will continue to move slowly for around a month...until school ends...forever!

The roof for #40 has been sitting for a couple weeks. It needs just a few touch ups. I'm trying to decide if I'll texture it or not prior to creating the mold (probably not).
Photobucket

Photobucket
The holes at the ends are for ventilation. They probably weren't there on the baggage cars, but I'd bet they were on the chair cars...which will use a lengthened version of this roof. I'm close to settled on relationship of the windows, window posts, and blind end space on #6 and #7-8. Once I've settled it, I'll start on the masters for their sides/ends.

Photobucket
This is a 23' Colorado Central flat car. I got around to adding a few more details to it...the stake pockets in particular. I've toyed with adding the couplers now for some test runs.

Photobucket
Not only did they only cost me a fraction of commercial parts, but they are more accurate for these cars. I still need to add the u-bolts to them. This model doesn't have intermediate sills as I'll be stuffing weights into their place. This car and my 24' lime car account for 2 of my 4 pairs of Colorado Central trucks. I'm currently leaning towards the metal sheathed powder car and an excursion car for the others. I'll also have to decide if these will have hand or air brakes...the powder car definitely gets hand brakes with dual staffs.

I have two additional projects that I've started, but since I plan to publish them, I won't be showing them here until after they are either published or turned down.

Monday, September 21, 2009

Complete roof frame for #40

Photobucket

Photobucket

Photobucket

The holes in the end are for ventilation...not for the model, but on real cars. I don't know if this baggage car had such a feature (it wouldn't have been as necessary), but I've added it so that I'll have it for the combines and coaches that'll use this roof.

I'll remove the two cross braces once the sheathing is in place.

Thursday, September 3, 2009

Roof, #40, step 4

Here are the end profile pieces, shaped:
Photobucket

Here they are laid out for orientation:
Photobucket

And here's the clerestory with its carlines installed.
Photobucket
It is currently 33'4" long. The additional 8" of body length and 4'2" of overhangs will come from the end profile pieces.

Next, I'll be attaching the rafters...and it will start to look pretty. I'd really love to use as many carlines as the prototype, but that is wayyyy too much work.

Wednesday, August 26, 2009

Monday, August 24, 2009

More carlines

Here are the carlines. The deck carlines are 2" tall. The rafters haven't yet had their undersides formed...but they'll be 6" wide at the base and 2" tall on along the length.


The patterns I used are at the top-left of the picture. For the deck carlines (top of the clerestory), I only used the patterns to form the top curves and then my calipers to mark the bottoms of these...followed by cutting the bottom sides out.


I have three main options as to where to go next:
1) form the clerestory sides/windows
2) form the end curves
3) cut out the undersides of the rafters.

I've chosen #1. I decided to go with 12" tall clerestory sides. A friend kindly checked some dimensions from the plans of the modernized version of this car that were published in the July/August 1989 Gazette (C&S #1)...and this verified that I'd guestimated some of the dimensions correctly. It is handy to study standard practices!

Here are the 210 pieces of the clerestory sides ready for assembly:


A little less than an hour later, here's one of the two sides:


I've designed this in a simpler maner than the sides since I intend to duplicate this in resin...the windows are not openable nor have the type of complicated/prototypical construction that I'd normally use.

Doing a bit a research over the weekend, I determined that in addition to baggage cars #40 and #41, three other cars can use this same roof. #40 & #41 were 34' long, 8' wide, and had 9' body/roof heights. #6 had the same roof profile and identical dimensions, only the clerestory window patern was slightly different (it was a combine); similarly, coach #7 and chair car #8 were 40'4" long, 8' wide, 9' tall, and had the same roof profile and clerestory window layout. So I'll be able to squeeze 5 cars out of this roof (I'll use three of the roof castings to make the two roofs for #7 & #8). I'll have to see if it is possible for me to widen this roof for use on #45 which was 34' long, 9' tall, and 8'2" wide...with a very different clerestory window pattern.

Friday, August 21, 2009

Roof for #40, step 1

Carline production has begun. I want a minimum of 12 of these per side, 24 total, with a maximum of 20 per side (40 total).


Next up, I'll be cutting the bottoms of the carlines so that they are basically arches instead of square.

Saturday, August 15, 2009

Some details on NKP hudsons

Last night, I decided to renew the fight against my Nickel Plate hudson. I actually have two, plus a long term lease on a third, but my first one is the one I think of as MY NKP hudson. She was the most expensive locomotive I've ever purchased by a wide margin...and she has elephant ears. She is also, in many respects, my worst locomotive.

Nickel Plate Products imported these locomotives in 1977. The L-1a's came with elephant ears and mars lights...the L-1b's came without these details. In 1982, the imported more L-1a's that were factory painted. All were made in Japan and have a reputation as bad locomotives...with numerous ones have self destructed. The biggest problem is in the way the cylinder block is attached, as well as the valve gear. These parts are loose enough that they can slide around and cause binds. Combining that with their bad open frame motors, and they aren't winners. But, they are the only NKP passenger power ever offered (aside from the berks that were equiped for passenger service). Ironically, the other two hudsons have had their problems fixed...so they are merely new motors away from being excellent locomotives.

A friend, Wayne, tipped me off as to the best way to install the motor in her. Since the motor is too large to slide through the ashpan, I'll mount it in the firebox and use tweezers to place the universal when it is being put together.

Last night, I removed the gearbox from my troubled hudson...so that it can roll freely. This has allowed me to attack the problems with the valve gear. I've bent various parts around to try to help them avoid binding...but there is just so much slop in the mechanism that I fear a relapse even though it is quite smooth right now.

With that done for now, I've gone after fixing a few of the details on the boiler. I noticed that one of the sand lines is missing, plus a number of the parts are crooked. Upon further review, the missing sandline shouldn't be there...it is an error.

Variations:
The L-1a's were built in 1927 by Alco-Brooks. They were the 2nd, 3rd, 4th, and 5th hudsons ever built. They were numbered 170-173. After WW2, they were extensively rebuilt with new frames, elephant ears, and various other upgrades. Sometime after 1946, the L-1a's received additional sand lines as the HO hudsons have...apparently for backing up into LaSalle Street Station. 170-172 were defiled in the 1950s with Mars lights...one of the many reasons that 1940s railroading was superior to 1950s railroading. The 170 sits in the St. Louis Transportation Museum. The 173 was purchased by a man whom intended to save her, but his untimely death led to her getting cut up.

The L-1b's were built in 1929 by Lima. They were #174-177. As with the pacifics (and the berks), the Limas were better than the Alcos...as the 175 and 177 were distinctly the best hudsons (162 was the best pacific). 174 and 176 were both defiled with Mars lights. 174 & 175 had the same fate as the 173. All four Limas never recevied the additional sand line...and since my models will be/are Limas, they'll have their extra sand lines removed. I need to research the tenders a bit more as they varied in the 1940s...and I don't want them to have the standard 1950s hudson tender if they didn't have it in 1948.

Perhaps, in the future, I'll add more L-1s to my roster by acquiring USRA light 4-6-2s and bashing them. The mechanism is identical to that of both the NKP pacifics and hudsons, and so it will spare me the effort of fixing another brass L-1. Two manufacturers have had USRA light 4-6-2s that have been overdue for nearly a year.

Tuesday, August 11, 2009

Box steps

I've been working on box steps. My waycar, paycar, baggage car, and coaches all need them. They need to be slightly different sizes for each...and my waycar needs ones that are a slightly different shape. I've cut out enough parts for the first three sets...the waycar, baggage car, and paycar. I haven't checked to see what shape they'll need to be for the Barney & Smith coaches. Since I can build my own, I can't just settle for what is commercially available!

Photobucket
Here's the sheet I've used for most of the sides of the box steps. The reverse curved sides are for passenger cars. The simpler ones are for the waycar. I studied every photo I could of the 13' waycars to get the shape correct. The earlier cars had strap steps...and I believe that they were both longer than these as well as painted red instead of a light color (I prefer white).

Here's one set of the passenger car cutouts along with the baggage car:
Photobucket
I decided not to put too much effort into the floor of the baggage car. I'm on the fence as to whether or not add a lamp and interior at this point. I may start the roof next.

Here's what it looked like before I added the floor but after glazing the windows:
Photobucket

Here are the waycar box steps under construction:
Photobucket

The first two sets have been installed, so just the above two need to be completed:
Photobucket
Don't be deceived by the photo. The two are nearly identical in size...almost spot on in every dimension...and they should be. For the cupola car is C&S 1006...which was either DSP&P #72 or #73 before being modernized...and the waycar is the series which included the #72 or #73.

My next waycar will make up for the deficiencies in that car. I'm planning to add #69...a 13' waycar that was red with black lettering (#72 was white with black lettering) and then a #64 which will be a 15' car with white lettering...strap steps, and less grab irons.

Wednesday, July 29, 2009

Next project?

I'm debating between two cars...

The DSP&P's first couple passenger cars...the Auraria and the Denver...
Or the DSP&P's Bower, Dure & Co cars...#16, 17, 22-25...

All eight cars were very similar. All had similar roofs and had classic mid-early narrow gauge features. The biggest difference was that the BD&Co cars were wider. Either option produces both combines and coaches. Another difference is that the Denver, coach #2, burned in 1880.

Combine #1, Auraria, shows up in this photo from the Ted Kierscey Collection. The coach behind it is one of the Barney & Smith cars that I'm already building.
http://narrowgauge.org/images/tkcok/m0048.jpg

This next view shows one of the BD&Co cars at Nathrop...
http://narrowgauge.org/ngc/graphics/tkierscey/dspp/dspp0012.jpg

And another view with two of them in a row...
http://narrowgauge.org/ngc/graphics/tkierscey/dspp/dspp006.jpg

And another view which could be the Denver or a BD&Co car...along with my baggage car...
http://narrowgauge.org/images/tkcok/m00422.jpg

I've never met Ted, but I'll thank him for sharing is wonderful collection whenever we do meet!

I'm inclined to create a resin kit out of the one I select. If you would be interested in one or the other...leave a comment...to help me decide which to do. I'd probably offer the BD&Co with either the original or a modern roof.

I'm going to make a mold for my baggage car and B&S car roofs. I've decided that I'd like to do so in case I make more of either...as there was a second baggage car identical to the one I'm building and a number of additional B&S coaches in California/Nevada...particularly on my two favorite California NG roads...the Nevada County Narrow Gauge and the Carson & Colorado/SPng.

Tuesday, July 28, 2009

Train Festival 2009

Photobucket
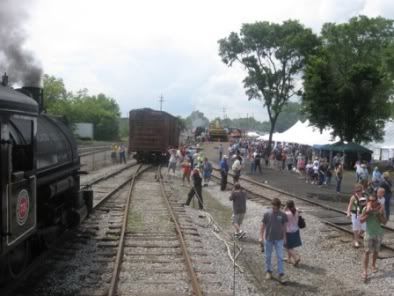
We had a great time at Train Festival.

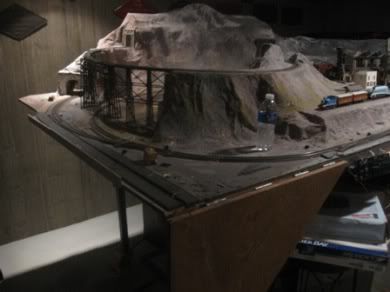
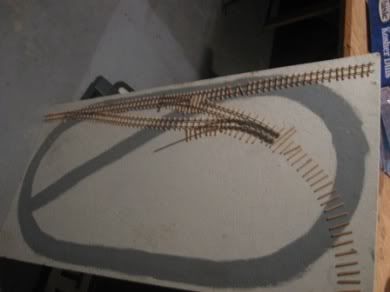
Our weekend started with a drive up to visit my family on Thursday. My Grandmother was in the hospital (she's now out) and so we took the Liam in to see her. Once we got to my parents' house, I began ripping up all of the old HO yards and much of the old main...leaving just the branch line, coal mine, and an oval for continuous running below the branch.
Photobucket
Photobucket
Photobucket
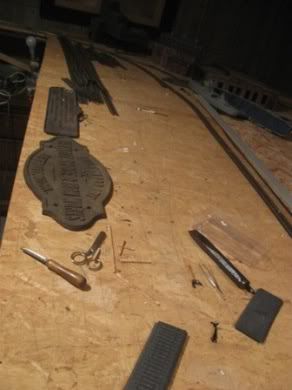
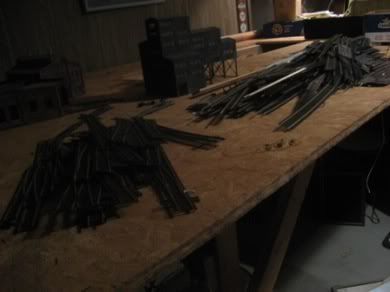
All of the trackage I removed. Flex track on the right, turnouts on the left.

I also found the On3 switching layout I started back in high school...On3 in a 2'x4' space!
Photobucket

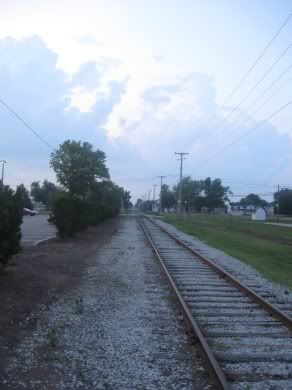
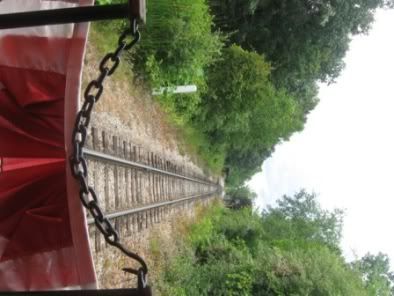
We then headed on to stay with them at the other house...two blocks from the Nickel Plate's Minster branch. The rail was dated 1913...so it actually predated the NKP's take over of the LE&W. My dad suggested that it is probably around 80# rail (it wasn't stamped, but I thought it was lighter than 90# rail).
Photobucket

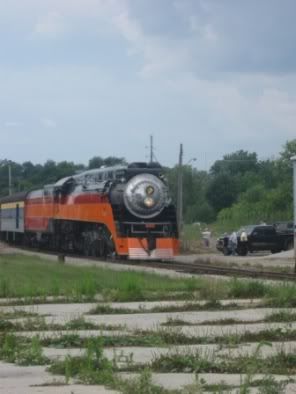
We headed up and caught the Daylight at Alma, MI.
Photobucket

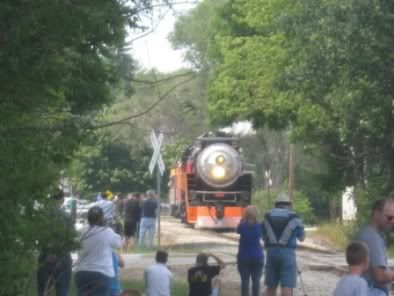
And I figured out where the photo run-bys were, and caught all three...
Photobucket
Photobucket

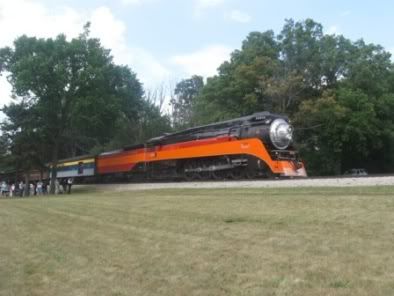
And then caught it once more after the run-bys...
Photobucket

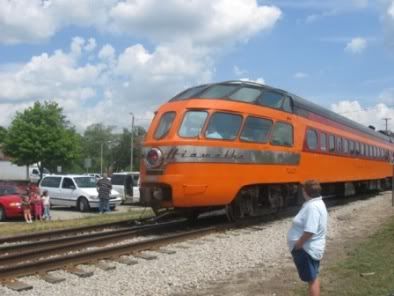
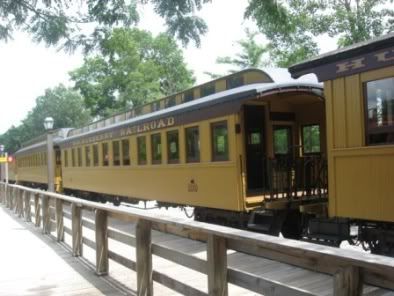
I'd love to see the interior of this car:
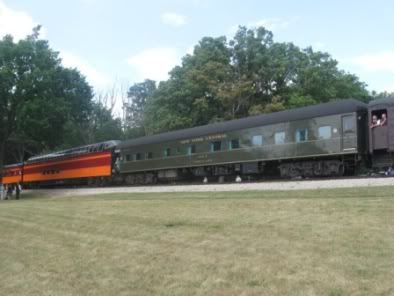
Photobucket

And ride in this:
Photobucket

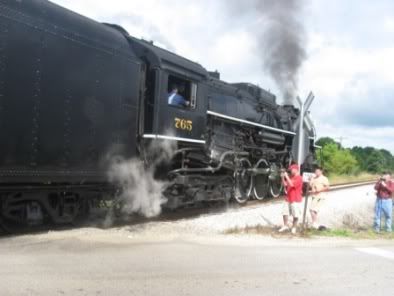
The following morning, dad and I caught the 765 before she departed Owosso...as she was covering for the ill 1225:
Photobucket

Based on the 1225 crew's response to their trouble, it sounds bad...as did what I've heard. Hopefully, once they've been able to get at the problem, it will be fixed in time for the rest of their season. Their website has been silent about it, which implies to me that they aren't confident enough to assert that she'll be ready, but they have enough hope not to cancel anything.

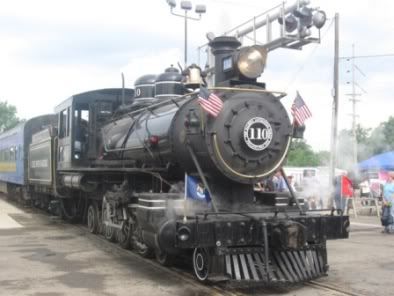
After the 765's departure, we caught the Little River pacific as her excursion passengers loaded...
Photobucket

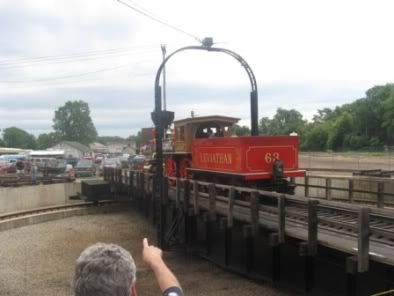
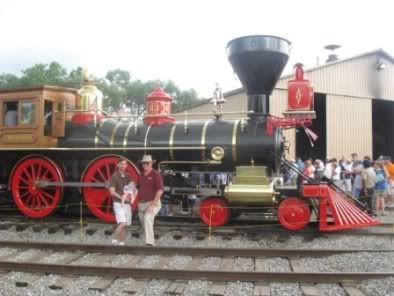
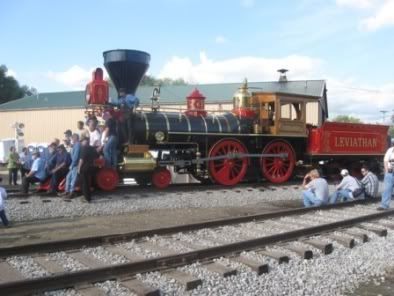
Once inside the festival, we went straight to the back to see the Leviathan...a brand new replica of an 1868 4-4-0.
Photobucket

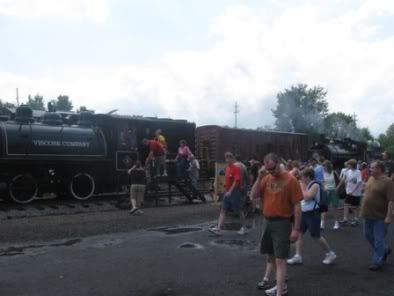
Nearby was the former Gettysburg RR 2-8-0.
Photobucket
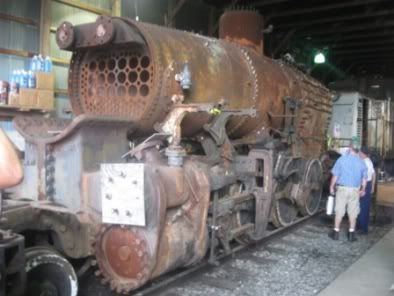
Her fellow GRR 4-6-2 was the engine that had the boiler explosion (NOT a catastrophic explosion) which prompted new FRA boiler rules and sidelined many perfectly good locomotives. It is worth noting that the rules wouldn't have done anything to prevent the gross operator error that caused the Gettysburg incident. I saw both this 2-8-0 as well as that 4-6-2 a few years ago near the Ohio Central's Morgan Run shops.

There was a Weaver NKP hudson on one of the display layouts...
Photobucket
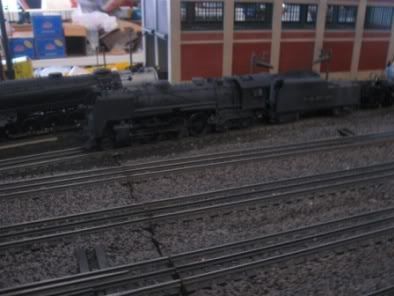
I drooled over those when they came out. I love them.


And then the family arrived...
Photobucket

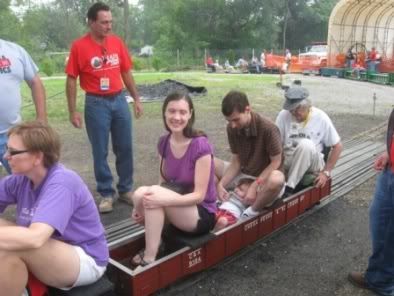
And we made a B-line to the 1/8th scale trains for a ride...
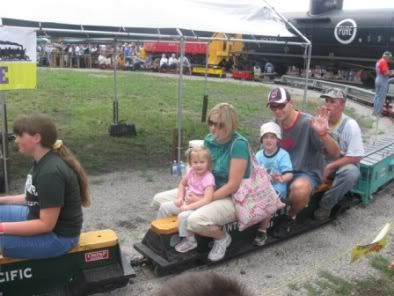
Photobucket
Photobucket
Photobucket
My brother's family

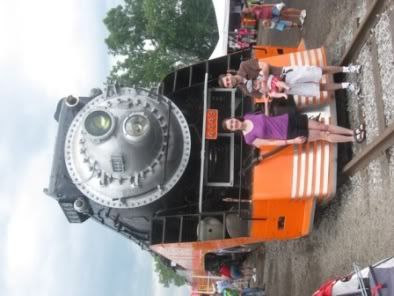
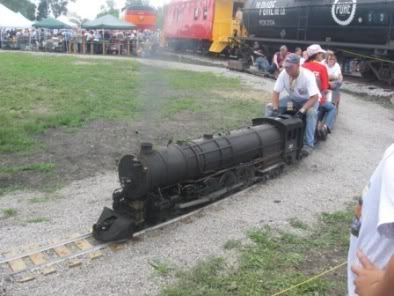
One of the live steam 1:32 railroads had an SP GS-4 operating near the real SP GS-4...
Photobucket

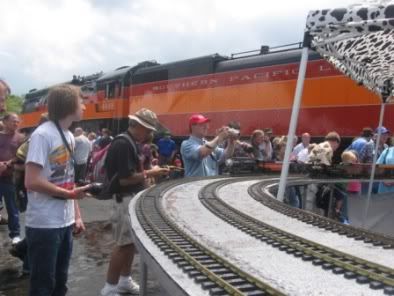
But the ultimate model at the show was this Southern PS-4...
Photobucket
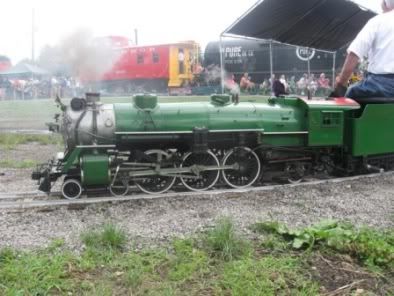
It's whistle sounded incredible unlike most 1.5" scale locomotives.

Photobucket
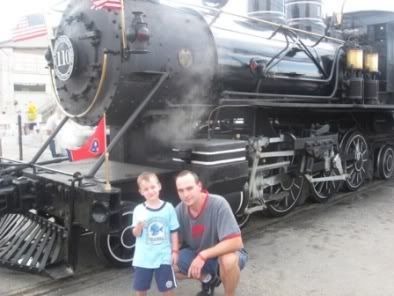
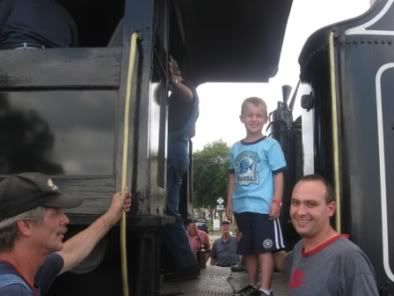
Three generations of railfans...

Photobucket
Photobucket
Photobucket
Photobucket

And my nephew enjoyed himself...
Photobucket
Photobucket
That Little River 4-6-2's tender carries 10 tons of coal and 4500 gallons of water...while the 765 is 22 tons and 22,000 gallons. So I'd guess that the 4-6-2 has a coal range of around 350 miles and a water range of less than 50 miles.

Sunday was an interesting day. We chased the 765 in the morning...
Photobucket

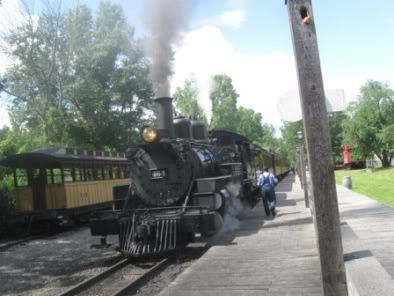
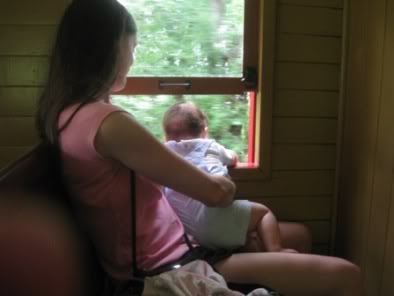
Then broke off the chase to ride the Huckleberry Railroad...
Photobucket
Photobucket

My brother's family rode the trip before us...
Photobucket
Photobucket

Liam loved it
Photobucket
Photobucket
Photobucket
Photobucket
Photobucket
Photobucket
Photobucket
Photobucket
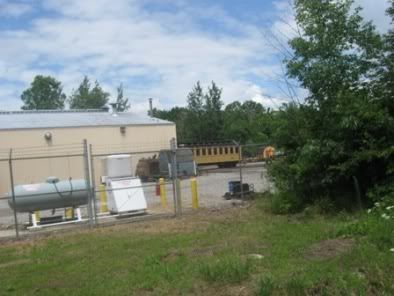
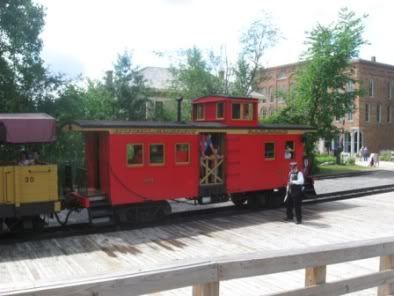
That's ex-D&RGW coach #308 at their shops

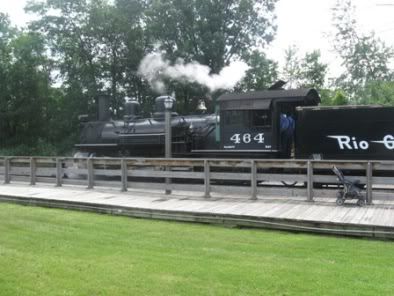
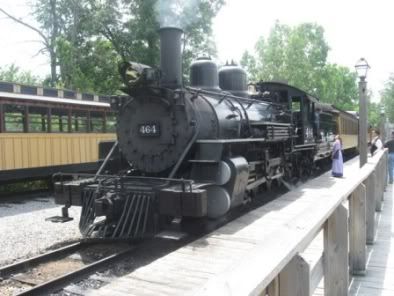
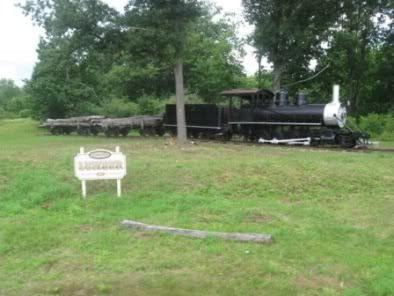
And a Mexican 2-8-0...
Photobucket

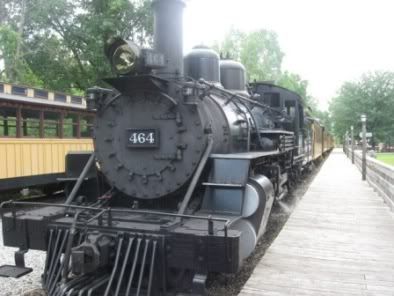
Their primary power is the ex-D&RGW #464 (which has been immortalized by many models) and an Alaskan 4-6-0 #152. They also have a Quincy and Torch Lake 2-6-0 sitting behind their shops.

I had a wonderful time with the crew...it is an incredibly well run railroad...and loaded with excellent equipment. Their best piece (historically) is definitely their ex-NPC coach #8 which was built by Kimball in 1875...an extremely rare bird...and they do not use it for its protection. Their hospitality delayed our departure by an hour...but it was thoroughly worth it!

The delay caused us to reach Lima at dinner time...so we stopped at the Kewpee. Being so close to the NKP 779's home in Lincoln Park, we headed on over.
Photobucket

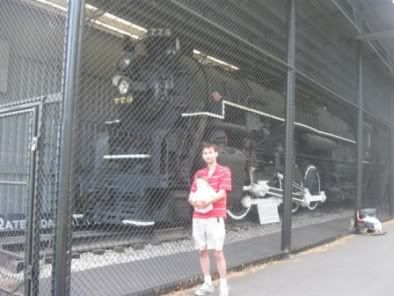
Much to my horror, I discovered a hole had been cut in the fence.
Photobucket

My father is one of the caretakers, and so I immediately had a park ranger dispatched and notified a caretaker whom brought over his keys. We then went in and found no damage or missing items. Suddenly, the delay which made us late to Huckleberry and the excellent time with the crew there made me very glad. The Lincoln Park event added another hour delay...but I couldn't leave until it was taken care of. The result was that Liam had a melt down for the last 45 minutes of our drive home...but I'm glad that the strange day happened as it did.

So, I saw 8 locomotives at Train Festival, 4 at Huckleberry, 1 at Durand, but the only locomotive I climbed into the cab of was the 779...which was under lock and key!