
The patterns I used are at the top-left of the picture. For the deck carlines (top of the clerestory), I only used the patterns to form the top curves and then my calipers to mark the bottoms of these...followed by cutting the bottom sides out.
I have three main options as to where to go next:
1) form the clerestory sides/windows
2) form the end curves
3) cut out the undersides of the rafters.
I've chosen #1. I decided to go with 12" tall clerestory sides. A friend kindly checked some dimensions from the plans of the modernized version of this car that were published in the July/August 1989 Gazette (C&S #1)...and this verified that I'd guestimated some of the dimensions correctly. It is handy to study standard practices!
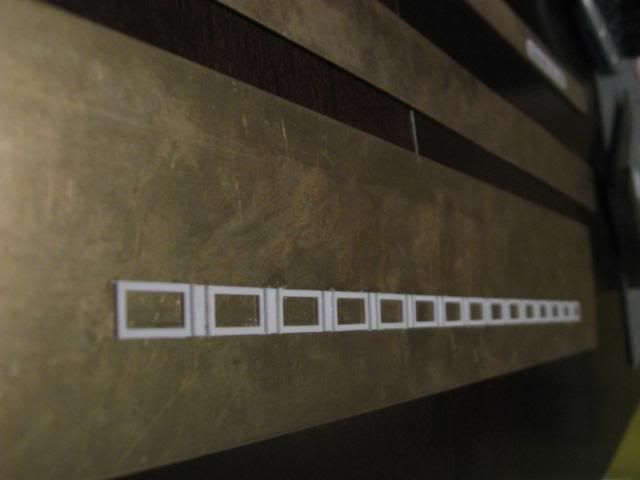
Here are the 210 pieces of the clerestory sides ready for assembly:

A little less than an hour later, here's one of the two sides:
I've designed this in a simpler maner than the sides since I intend to duplicate this in resin...the windows are not openable nor have the type of complicated/prototypical construction that I'd normally use.
Doing a bit a research over the weekend, I determined that in addition to baggage cars #40 and #41, three other cars can use this same roof. #40 & #41 were 34' long, 8' wide, and had 9' body/roof heights. #6 had the same roof profile and identical dimensions, only the clerestory window patern was slightly different (it was a combine); similarly, coach #7 and chair car #8 were 40'4" long, 8' wide, 9' tall, and had the same roof profile and clerestory window layout. So I'll be able to squeeze 5 cars out of this roof (I'll use three of the roof castings to make the two roofs for #7 & #8). I'll have to see if it is possible for me to widen this roof for use on #45 which was 34' long, 9' tall, and 8'2" wide...with a very different clerestory window pattern.

No comments:
Post a Comment