Few debates have less basis in fact and are more edifying than those which revolve around correct colors. It is sometimes even worse if color photographs do exist!
Here are a few basics which I know and which affect my opinions:
-There is no such thing as a uniform, standard railroad color.
Why? First, even if they start off identical in hue, cars that spend much of their time in the shade won't be bleached as badly as cars out in the sun (there are other weather factors as well).
-No railroad shop had the facilities and staff to repaint every single car the exact same day from the same batch of paint. Most cars were only repainted as needed. Many South Park cars carried their original numbers and lettering into the late 1880s after the renumbering in mid-1885. This was particularly important when we factor in that paint's weren't mixed by computers and hence would vary a bit from batch to batch...year to year.
-The vast majority of railroad photographs from the steam era (the period of my interest) were in black and white...so even if the colors are known, the matching a shade can be extremely tough...even if there weren't variations. Since different processes where sensitive to different types of light...mint green for example...would look almost the same as white or light yellow in many B&W photos (the great South Park Waycar and Tiffany debates...white/white for me).
The only mentioning I can recall of Oahu Railway colors is "Pullman Green" in Vol 1 of the Hawaiian Railroad WWII Photo Album. The cars...both preserved (I trust #64's colors the most) and white I can gleam from the B&W photos look much lighter than either Scalecoat and Floquil's Pullman Green. Granted, there are variations in the colors as represented on compute displays (mine has been calibrated to ameliorate this), but I like what I've come up with.
Here's my test:
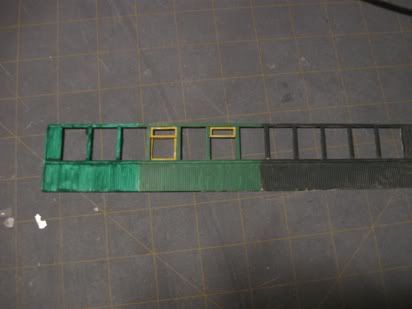
The left is $0.50 acrylic green. The right is Floquil's Pullman Green. The center is Floquil's light green. These parts were not fully cleaned up before painting...so it didn't adhere too well...by well enough for this test. Light green with reefer yellow windows works for me. In some photos, the yellow looks to orange while in others doesn't appear to have enough orange. I've been careful to examine the colors under both high and low light conditions...as that matters too. A perfect color match from a prototype will yield way too dark of a model...prototypes are seen under much, much brighter lighting than is practical for a model railroad.
-----------------------------------------------
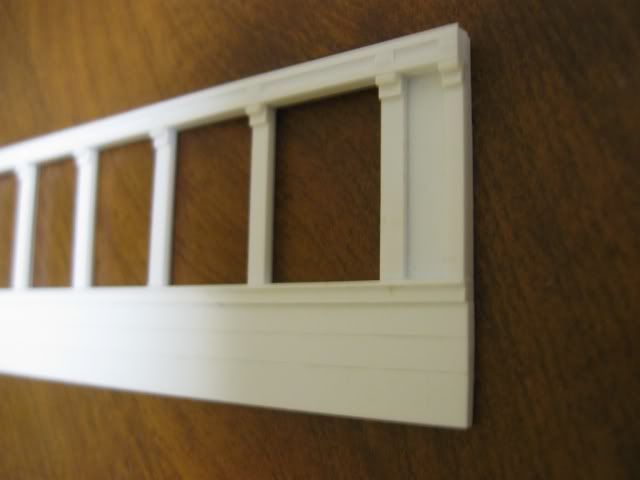
Here are some of my castings:
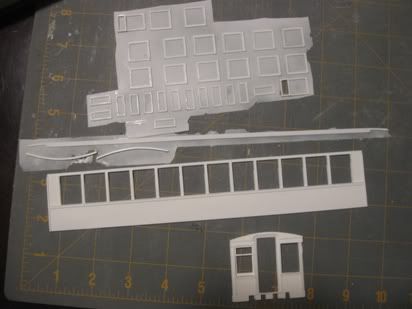
I think they are pretty. I have a window insert in one of the car ends. The sides a spot on thickness...0.060" at the sheathing. The tolerance for acceptable window castings is under 0.040" of total thickness. That way they'll fit into the grooves to slide up and down.
This evening I'm going to either start (or completely assemble) the interior master. It'll probably be a two sided part. I've designed it to allow the windows to be removable after assembly (when the roof is off). A groove will exist in between the interior wall and the fascia (letter board) to allow for the roof to lock into place/prevent light from leaking. I will not produce a roof mold until after the master has been test fitted to a complete production car body. The underframe is awaiting the arrival of digital photos to supplement framing measurements on OR&L #1. At that point, hardware construction will begin (brake rigging and such).
Since I don't know when to expect the photos from the very generous person whom has gone out of their way to help (thank you very much!), I'll probably make a trip to my LHS in the next couple of days to secure parts for construction of the side masters on the South Park baggage car kit. (an easy assembly...I've previously worked the details out on my #40).
I need to prepare the decals for the Oahu Railway cars. Mein Frau ist ein graphic designer. Her day job is designing signs on vehicles.
 I like it. I've left the footboard off. It'll be a detail to be added separately, so that if someone screws up with assembly...it is okay (it also gives me slightly looser tolerances when casting).

