
Wednesday, August 26, 2009
Monday, August 24, 2009
More carlines
Here are the carlines. The deck carlines are 2" tall. The rafters haven't yet had their undersides formed...but they'll be 6" wide at the base and 2" tall on along the length.

The patterns I used are at the top-left of the picture. For the deck carlines (top of the clerestory), I only used the patterns to form the top curves and then my calipers to mark the bottoms of these...followed by cutting the bottom sides out.
I have three main options as to where to go next:
1) form the clerestory sides/windows
2) form the end curves
3) cut out the undersides of the rafters.
I've chosen #1. I decided to go with 12" tall clerestory sides. A friend kindly checked some dimensions from the plans of the modernized version of this car that were published in the July/August 1989 Gazette (C&S #1)...and this verified that I'd guestimated some of the dimensions correctly. It is handy to study standard practices!
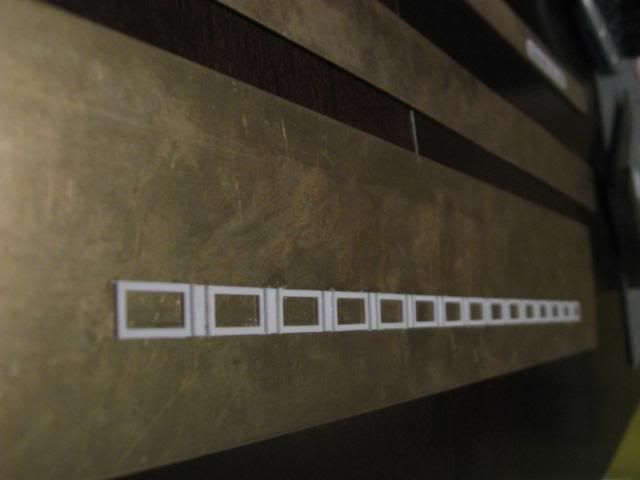
Here are the 210 pieces of the clerestory sides ready for assembly:

A little less than an hour later, here's one of the two sides:
I've designed this in a simpler maner than the sides since I intend to duplicate this in resin...the windows are not openable nor have the type of complicated/prototypical construction that I'd normally use.
Doing a bit a research over the weekend, I determined that in addition to baggage cars #40 and #41, three other cars can use this same roof. #40 & #41 were 34' long, 8' wide, and had 9' body/roof heights. #6 had the same roof profile and identical dimensions, only the clerestory window patern was slightly different (it was a combine); similarly, coach #7 and chair car #8 were 40'4" long, 8' wide, 9' tall, and had the same roof profile and clerestory window layout. So I'll be able to squeeze 5 cars out of this roof (I'll use three of the roof castings to make the two roofs for #7 & #8). I'll have to see if it is possible for me to widen this roof for use on #45 which was 34' long, 9' tall, and 8'2" wide...with a very different clerestory window pattern.
The patterns I used are at the top-left of the picture. For the deck carlines (top of the clerestory), I only used the patterns to form the top curves and then my calipers to mark the bottoms of these...followed by cutting the bottom sides out.
I have three main options as to where to go next:
1) form the clerestory sides/windows
2) form the end curves
3) cut out the undersides of the rafters.
I've chosen #1. I decided to go with 12" tall clerestory sides. A friend kindly checked some dimensions from the plans of the modernized version of this car that were published in the July/August 1989 Gazette (C&S #1)...and this verified that I'd guestimated some of the dimensions correctly. It is handy to study standard practices!
Here are the 210 pieces of the clerestory sides ready for assembly:
A little less than an hour later, here's one of the two sides:
I've designed this in a simpler maner than the sides since I intend to duplicate this in resin...the windows are not openable nor have the type of complicated/prototypical construction that I'd normally use.
Doing a bit a research over the weekend, I determined that in addition to baggage cars #40 and #41, three other cars can use this same roof. #40 & #41 were 34' long, 8' wide, and had 9' body/roof heights. #6 had the same roof profile and identical dimensions, only the clerestory window patern was slightly different (it was a combine); similarly, coach #7 and chair car #8 were 40'4" long, 8' wide, 9' tall, and had the same roof profile and clerestory window layout. So I'll be able to squeeze 5 cars out of this roof (I'll use three of the roof castings to make the two roofs for #7 & #8). I'll have to see if it is possible for me to widen this roof for use on #45 which was 34' long, 9' tall, and 8'2" wide...with a very different clerestory window pattern.
Friday, August 21, 2009
Roof for #40, step 1
Carline production has begun. I want a minimum of 12 of these per side, 24 total, with a maximum of 20 per side (40 total).
Next up, I'll be cutting the bottoms of the carlines so that they are basically arches instead of square.
Next up, I'll be cutting the bottoms of the carlines so that they are basically arches instead of square.
Saturday, August 15, 2009
Some details on NKP hudsons
Last night, I decided to renew the fight against my Nickel Plate hudson. I actually have two, plus a long term lease on a third, but my first one is the one I think of as MY NKP hudson. She was the most expensive locomotive I've ever purchased by a wide margin...and she has elephant ears. She is also, in many respects, my worst locomotive.
Nickel Plate Products imported these locomotives in 1977. The L-1a's came with elephant ears and mars lights...the L-1b's came without these details. In 1982, the imported more L-1a's that were factory painted. All were made in Japan and have a reputation as bad locomotives...with numerous ones have self destructed. The biggest problem is in the way the cylinder block is attached, as well as the valve gear. These parts are loose enough that they can slide around and cause binds. Combining that with their bad open frame motors, and they aren't winners. But, they are the only NKP passenger power ever offered (aside from the berks that were equiped for passenger service). Ironically, the other two hudsons have had their problems fixed...so they are merely new motors away from being excellent locomotives.
A friend, Wayne, tipped me off as to the best way to install the motor in her. Since the motor is too large to slide through the ashpan, I'll mount it in the firebox and use tweezers to place the universal when it is being put together.
Last night, I removed the gearbox from my troubled hudson...so that it can roll freely. This has allowed me to attack the problems with the valve gear. I've bent various parts around to try to help them avoid binding...but there is just so much slop in the mechanism that I fear a relapse even though it is quite smooth right now.
With that done for now, I've gone after fixing a few of the details on the boiler. I noticed that one of the sand lines is missing, plus a number of the parts are crooked. Upon further review, the missing sandline shouldn't be there...it is an error.
Variations:
The L-1a's were built in 1927 by Alco-Brooks. They were the 2nd, 3rd, 4th, and 5th hudsons ever built. They were numbered 170-173. After WW2, they were extensively rebuilt with new frames, elephant ears, and various other upgrades. Sometime after 1946, the L-1a's received additional sand lines as the HO hudsons have...apparently for backing up into LaSalle Street Station. 170-172 were defiled in the 1950s with Mars lights...one of the many reasons that 1940s railroading was superior to 1950s railroading. The 170 sits in the St. Louis Transportation Museum. The 173 was purchased by a man whom intended to save her, but his untimely death led to her getting cut up.
The L-1b's were built in 1929 by Lima. They were #174-177. As with the pacifics (and the berks), the Limas were better than the Alcos...as the 175 and 177 were distinctly the best hudsons (162 was the best pacific). 174 and 176 were both defiled with Mars lights. 174 & 175 had the same fate as the 173. All four Limas never recevied the additional sand line...and since my models will be/are Limas, they'll have their extra sand lines removed. I need to research the tenders a bit more as they varied in the 1940s...and I don't want them to have the standard 1950s hudson tender if they didn't have it in 1948.
Perhaps, in the future, I'll add more L-1s to my roster by acquiring USRA light 4-6-2s and bashing them. The mechanism is identical to that of both the NKP pacifics and hudsons, and so it will spare me the effort of fixing another brass L-1. Two manufacturers have had USRA light 4-6-2s that have been overdue for nearly a year.
Tuesday, August 11, 2009
Box steps
I've been working on box steps. My waycar, paycar, baggage car, and coaches all need them. They need to be slightly different sizes for each...and my waycar needs ones that are a slightly different shape. I've cut out enough parts for the first three sets...the waycar, baggage car, and paycar. I haven't checked to see what shape they'll need to be for the Barney & Smith coaches. Since I can build my own, I can't just settle for what is commercially available!
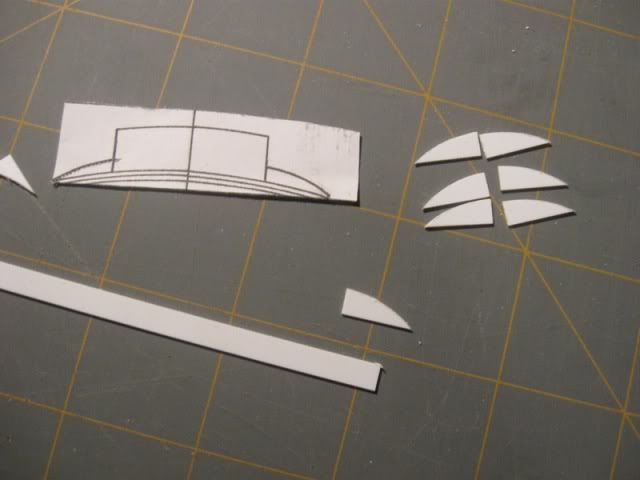
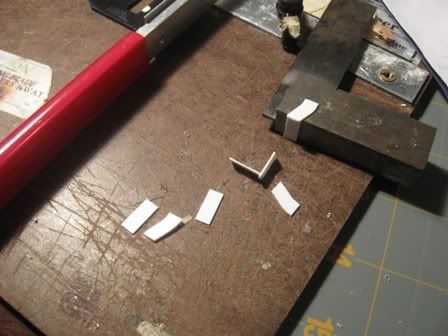
Here's the sheet I've used for most of the sides of the box steps. The reverse curved sides are for passenger cars. The simpler ones are for the waycar. I studied every photo I could of the 13' waycars to get the shape correct. The earlier cars had strap steps...and I believe that they were both longer than these as well as painted red instead of a light color (I prefer white).
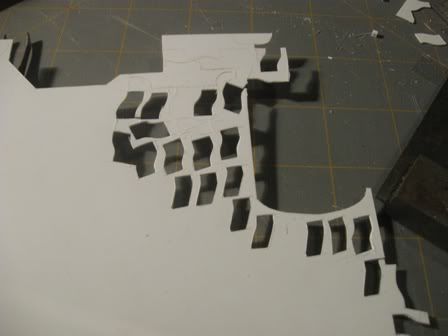
Here's one set of the passenger car cutouts along with the baggage car:

I decided not to put too much effort into the floor of the baggage car. I'm on the fence as to whether or not add a lamp and interior at this point. I may start the roof next.
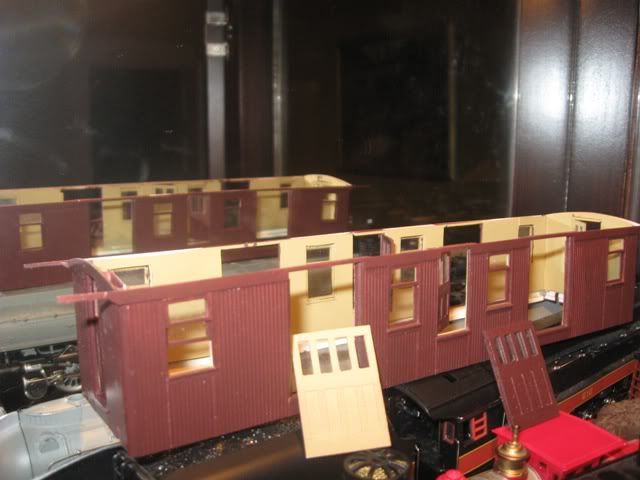
Here's what it looked like before I added the floor but after glazing the windows:
Here are the waycar box steps under construction:
The first two sets have been installed, so just the above two need to be completed:
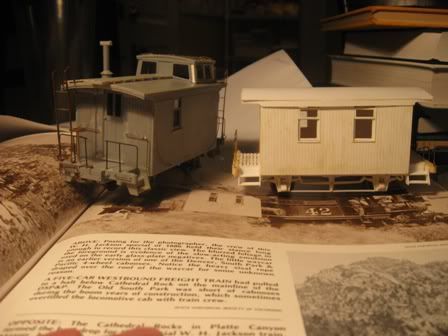
Don't be deceived by the photo. The two are nearly identical in size...almost spot on in every dimension...and they should be. For the cupola car is C&S 1006...which was either DSP&P #72 or #73 before being modernized...and the waycar is the series which included the #72 or #73.
My next waycar will make up for the deficiencies in that car. I'm planning to add #69...a 13' waycar that was red with black lettering (#72 was white with black lettering) and then a #64 which will be a 15' car with white lettering...strap steps, and less grab irons.

Here's the sheet I've used for most of the sides of the box steps. The reverse curved sides are for passenger cars. The simpler ones are for the waycar. I studied every photo I could of the 13' waycars to get the shape correct. The earlier cars had strap steps...and I believe that they were both longer than these as well as painted red instead of a light color (I prefer white).
Here's one set of the passenger car cutouts along with the baggage car:

I decided not to put too much effort into the floor of the baggage car. I'm on the fence as to whether or not add a lamp and interior at this point. I may start the roof next.
Here's what it looked like before I added the floor but after glazing the windows:

Here are the waycar box steps under construction:

The first two sets have been installed, so just the above two need to be completed:

Don't be deceived by the photo. The two are nearly identical in size...almost spot on in every dimension...and they should be. For the cupola car is C&S 1006...which was either DSP&P #72 or #73 before being modernized...and the waycar is the series which included the #72 or #73.
My next waycar will make up for the deficiencies in that car. I'm planning to add #69...a 13' waycar that was red with black lettering (#72 was white with black lettering) and then a #64 which will be a 15' car with white lettering...strap steps, and less grab irons.
Subscribe to:
Posts (Atom)
