Saturday, January 3, 2009
window production
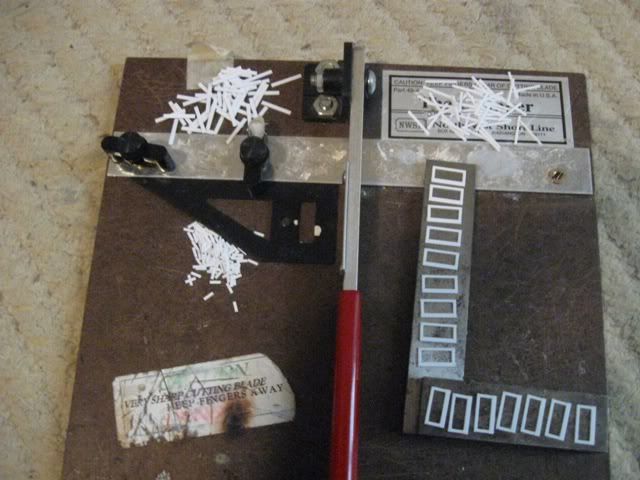
I'm cranking out the windows for the coaches. I've cut around 250 pieces for the fixed panes and assembled 1/4 of them. This is currently around 1hr-1.25hrs of cutting and gluing. I spend far more time deciding what to do than I spend actually doing it. The key to working quickly is to set up the chopper accurately and to make consistent cuts.


Thursday, January 1, 2009
New Years
I haven't been able to get much done over the past 3 weeks due to work, Christmas, and family.
I received a few items to help me with workin' on the railroad. I'll probably get a nice tools (or set of tools) with my Birthday & Christmas gift money (perhaps that micro mill I've been wanting to get).
There were a variety of gifts, such as the ever in demand On3 wheelsets and DSP&P decals. Here are a few notable items:
Smooth Cast resin. With a slightly longer (in practice) pot time than the alumilite I have previously used, and much lower viscosity, I'm hoping it is actually of value (unlike alumilite).
Coronado's DSP&P Link & Pin couplers. 8 pairs of these was great. They are always in short supply, so I was really happy to receive these.

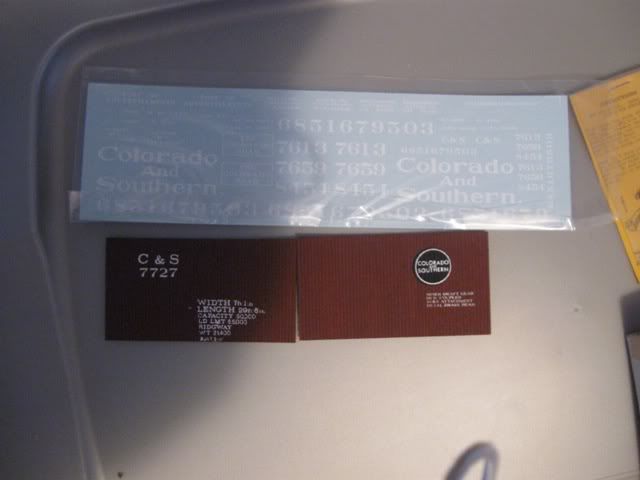
1905 C&S boxcar lettering. Last year I received a pair of extremely disappointing Ye Olde Huff'n Puff kits...a Tiffany Reefer and a C&S boxcar. I tried to salvage the original, pathetic paint & lettering job on the Tiffany (would you believe that despite what their directions said, Floquil Reefer White didn't match the car's paint) ...I then either severly modified our outright modified every detail part in the kit...and sawed all the parts down to the correct dimensions. The boxcar's dimensions are closer, but its lettering job is the single worst job I've ever seen on a car...including hand lettered cars. Not only is the placement and quality of the lettering terrible, some of it is wrong! (such as the car having been last shopped in Ridgeway...Ridgeway? It is a C&S car, not a RGS car!?!) So I'll be striping the paint off and applying these new decals.

For Christmas, Lisa picked up a passenger car decoder and a pair of Nn3 car kits for me. I'm not switching to Nn3, but I've wanted to build a kit for a while. She gave me a C&S caboose and an EBT hopper. If I decide to get an EBT 2-8-2, I'll letter the bobber to one of the pre-8wheel EBT cabeese. Unfortunately, adding a locomotive will be in the distant future since I won't make much budget available for non-On3 items. Nn3, HOn3, and On3. HOn3 uses Z-scale track and wheels. The Nn3 car is a model of C&S #1002. The HOn3 is a model of the 1005, and the On3 model is of 1006. I've removed all the flash from the 1002 and partially preped the frame.


I received a few items to help me with workin' on the railroad. I'll probably get a nice tools (or set of tools) with my Birthday & Christmas gift money (perhaps that micro mill I've been wanting to get).
There were a variety of gifts, such as the ever in demand On3 wheelsets and DSP&P decals. Here are a few notable items:
Smooth Cast resin. With a slightly longer (in practice) pot time than the alumilite I have previously used, and much lower viscosity, I'm hoping it is actually of value (unlike alumilite).
Coronado's DSP&P Link & Pin couplers. 8 pairs of these was great. They are always in short supply, so I was really happy to receive these.
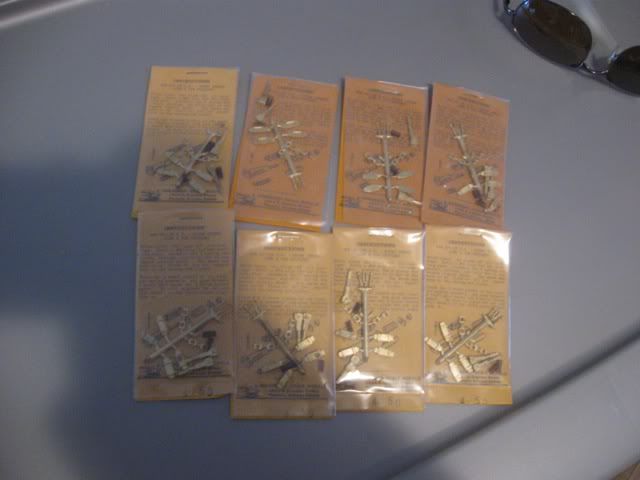
1905 C&S boxcar lettering. Last year I received a pair of extremely disappointing Ye Olde Huff'n Puff kits...a Tiffany Reefer and a C&S boxcar. I tried to salvage the original, pathetic paint & lettering job on the Tiffany (would you believe that despite what their directions said, Floquil Reefer White didn't match the car's paint) ...I then either severly modified our outright modified every detail part in the kit...and sawed all the parts down to the correct dimensions. The boxcar's dimensions are closer, but its lettering job is the single worst job I've ever seen on a car...including hand lettered cars. Not only is the placement and quality of the lettering terrible, some of it is wrong! (such as the car having been last shopped in Ridgeway...Ridgeway? It is a C&S car, not a RGS car!?!) So I'll be striping the paint off and applying these new decals.
For Christmas, Lisa picked up a passenger car decoder and a pair of Nn3 car kits for me. I'm not switching to Nn3, but I've wanted to build a kit for a while. She gave me a C&S caboose and an EBT hopper. If I decide to get an EBT 2-8-2, I'll letter the bobber to one of the pre-8wheel EBT cabeese. Unfortunately, adding a locomotive will be in the distant future since I won't make much budget available for non-On3 items.
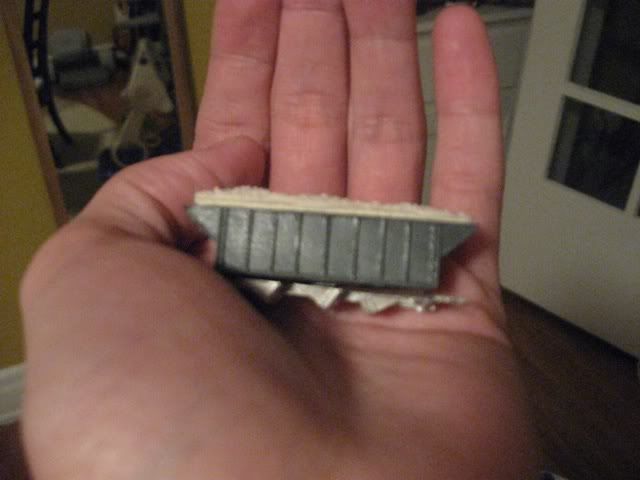
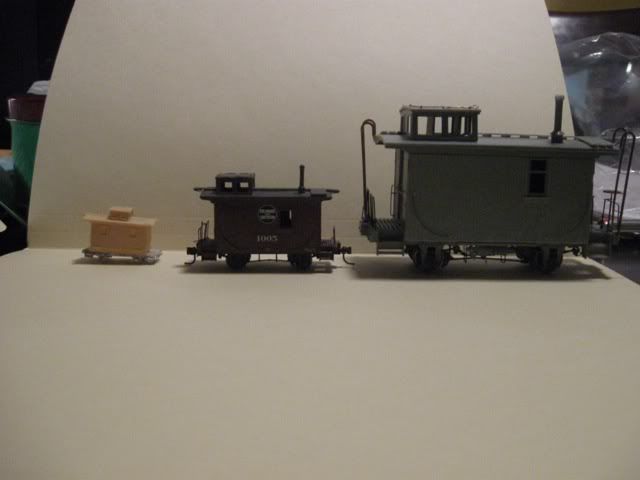 Nn3, HOn3, and On3. HOn3 uses Z-scale track and wheels. The Nn3 car is a model of C&S #1002. The HOn3 is a model of the 1005, and the On3 model is of 1006. I've removed all the flash from the 1002 and partially preped the frame.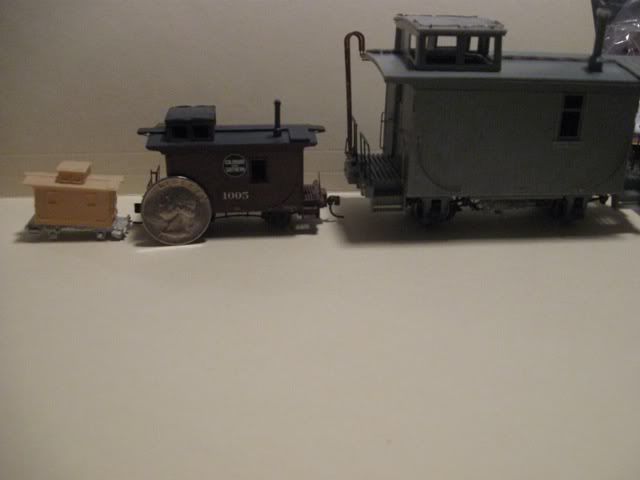
Friday, December 12, 2008
Moving panes
...are now assembled. No more windows needed for this car, except in the clerestory. It's coming along nicely.
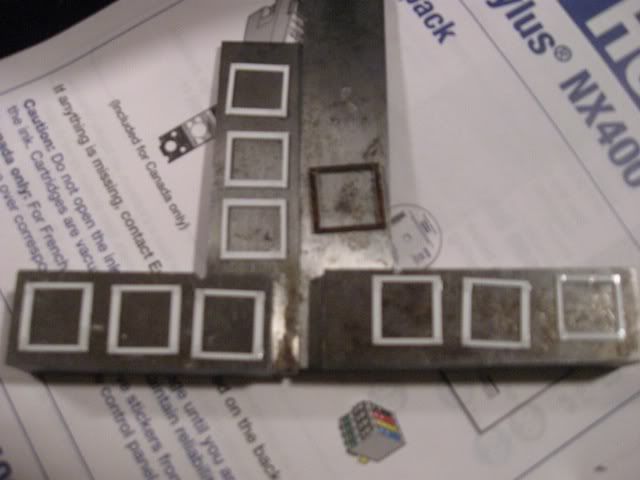
I'm looking forward to taking a picture of the 128 window panes needed for the two coaches. Intriguingly...I can fabricate them fast than to duplicate them in resin.
 I built one extra pane...just in case I'm not happy with or destroy one of the others.
The 10th pane is from the paycar. There is no optical illusion in this picture...it is noticeably large than the panes for #40. It is also of a different construction technique...11 pieces instead of 4, with an internal pocket for the glazing. I'm using a simpler technique this time to ease the installation of the glazing. I kind of like to get some super thin glass from Clover House, but I tend to think that it is too clear for 19th century glass...I feel that clear plastic is more accurate for the time period.
The photo that photobucket didn't like yesterday...

I'm looking forward to taking a picture of the 128 window panes needed for the two coaches. Intriguingly...I can fabricate them fast than to duplicate them in resin.
 I built one extra pane...just in case I'm not happy with or destroy one of the others.
The 10th pane is from the paycar. There is no optical illusion in this picture...it is noticeably large than the panes for #40. It is also of a different construction technique...11 pieces instead of 4, with an internal pocket for the glazing. I'm using a simpler technique this time to ease the installation of the glazing. I kind of like to get some super thin glass from Clover House, but I tend to think that it is too clear for 19th century glass...I feel that clear plastic is more accurate for the time period.
The photo that photobucket didn't like yesterday...
Thursday, December 11, 2008
windows installed
#40 has her windows. I created and installed them while watch da Bears beat the Saints.
Trying to decide on whether or not to light her. I'll have to hide the decoder in some freight if I do. I might just make provisions for lighting, but not actually install a decoder for now.
I need 2" moldings for the people doors...but probably won't get to the hobby shop to fetch them until 2009...we'll see. I'll turn my attention to sheathing the interior of the walls next.
The windows awaiting installation...
 The windows are installed, but photobucket doesn't want to let me display that image.
Trying to decide on whether or not to light her. I'll have to hide the decoder in some freight if I do. I might just make provisions for lighting, but not actually install a decoder for now.
I need 2" moldings for the people doors...but probably won't get to the hobby shop to fetch them until 2009...we'll see. I'll turn my attention to sheathing the interior of the walls next.
The windows awaiting installation...
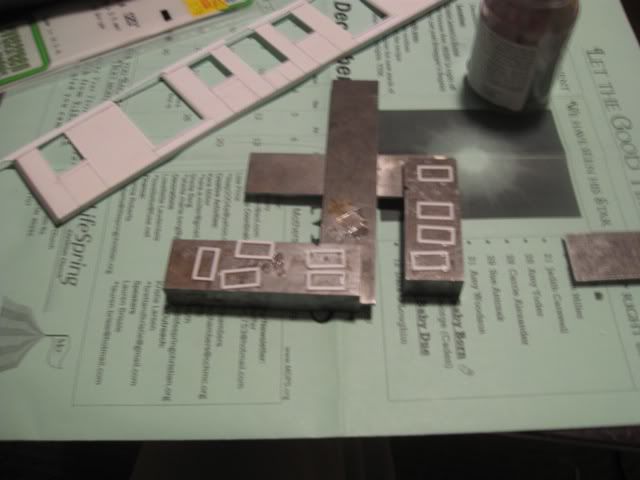 The windows are installed, but photobucket doesn't want to let me display that image.
Wednesday, December 10, 2008
40 sides nearing completion
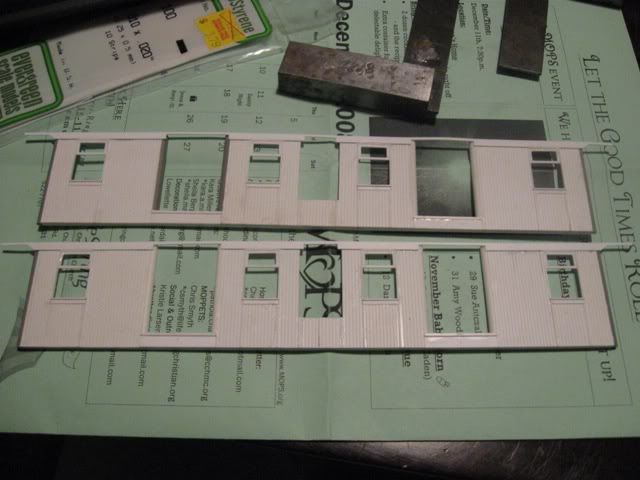
#40s sides are coming along nicely. I spent a pair of hours on the pair of sides. I examined the only known photos of either #40, 41, or 45 (nearly identical in photos...subtle differences in clerestory windows, width, and such). This helped me to determine how I was to cut the fascia. The coaches are awaiting my decision to give them either 6" or 7.5" Fascias (probably 7.5").
I then cut to fit and installed the sides of window frames. My new audio book, Retribution, is quite fascinating. I covers the last year of the Pacific War...but not in the usual sense...I don't really need to know how many shells the Adm Jesse Oldendorf's squadron fired on a particular occasion, but I am interested in the experience of the average Japanese soldier, the British soldier in Burma, and the Chinese civilian in Manchuko. This book gives me the latter.
 Here is #40's sides...with only the center door frame, fixed window panes, and interior walls to complete. Then I'll build a pair of ends and slap the body together. I rejoice that this car doesn't have a dropping bullnose roof or end windows. I hate the former and don't care for the latter. I'm really looking forward to all the simple duckbills (child's play compared to some bullnose roofes) on the Colorado Central cars. I've successfully assembled to bullnose roofes before, and there will be plenty more to come :-(
I then cut to fit and installed the sides of window frames. My new audio book, Retribution, is quite fascinating. I covers the last year of the Pacific War...but not in the usual sense...I don't really need to know how many shells the Adm Jesse Oldendorf's squadron fired on a particular occasion, but I am interested in the experience of the average Japanese soldier, the British soldier in Burma, and the Chinese civilian in Manchuko. This book gives me the latter.
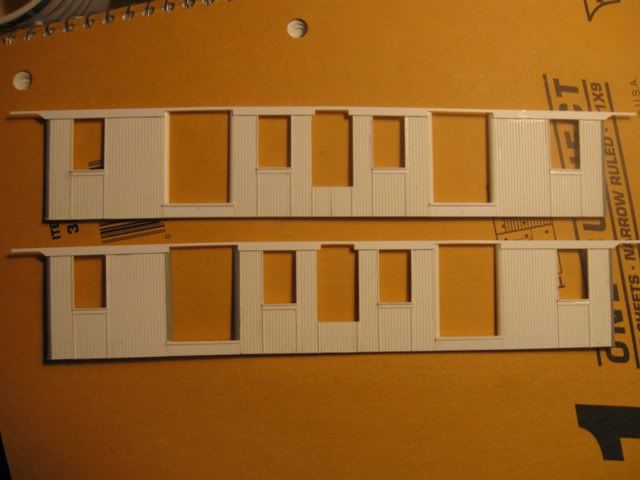 Here is #40's sides...with only the center door frame, fixed window panes, and interior walls to complete. Then I'll build a pair of ends and slap the body together. I rejoice that this car doesn't have a dropping bullnose roof or end windows. I hate the former and don't care for the latter. I'm really looking forward to all the simple duckbills (child's play compared to some bullnose roofes) on the Colorado Central cars. I've successfully assembled to bullnose roofes before, and there will be plenty more to come :-(
Sunday, December 7, 2008
Passenger car update
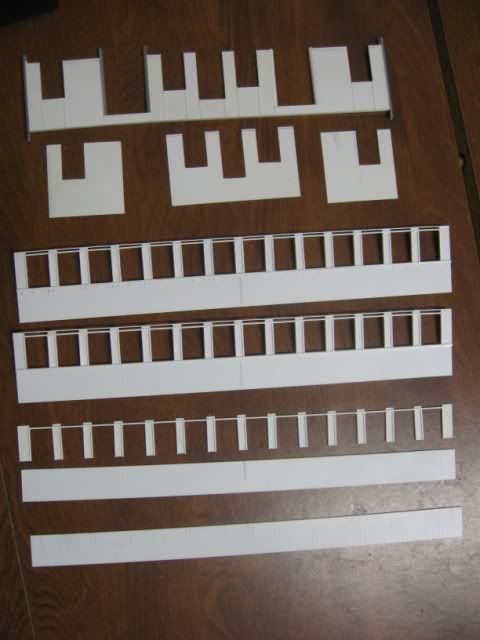
Here is the current progress. I spend a couple hours each of the past two nights on these. While the glue was drying last night, I began cutting pieces for the 2-8-0's tender. I need to decide on a number for the 2-8-0...so she'll have a name.

Tuesday, December 2, 2008
Gluing and soldering
I spend this evening (which didn't get started until 8pm) gluing the foam & track to the benchwork. I managed to get slightly more than half of it down. I also wired 1/4 of the layout for DCC using Free-mo standards (14 gauge buss, 18 gauge feeders). Every piece of rail has a lead and no rail joiners are used on each section (solder instead). I'm trying to force myself to get the mainline back into service for when Evan and Addy come to visit. In prep for this, I also created my trestle deck template. I want the full oval to be back in service...and maybe some rudimentery scenery.
Chester got a little too excited seeing the Grandt Line porter make a test run...so had him go downstairs with me. He's a good little model railroader, but he's sometimes too aggressive. His fuzzy paws with claws aren't very good at helping. He came back up when the Goose #4 was making a test run (Goose #4 has sound). Finally, C&S #22 took a pair of Grandt Line stock cars and caboose #1006 over the freshly wired track. #40 is currently in pieces for when I feel like creating molds of the domes.
I'll probably decide some night that it is again time to go back to the passenger cars and knock all 4 sides out. The first two are looking quite nice. I've got to decide if #3 and #5 had 6" or 8" boards above the windows. I guess I should just calulate it from the specs...
Chester got a little too excited seeing the Grandt Line porter make a test run...so had him go downstairs with me. He's a good little model railroader, but he's sometimes too aggressive. His fuzzy paws with claws aren't very good at helping. He came back up when the Goose #4 was making a test run (Goose #4 has sound). Finally, C&S #22 took a pair of Grandt Line stock cars and caboose #1006 over the freshly wired track. #40 is currently in pieces for when I feel like creating molds of the domes.
I'll probably decide some night that it is again time to go back to the passenger cars and knock all 4 sides out. The first two are looking quite nice. I've got to decide if #3 and #5 had 6" or 8" boards above the windows. I guess I should just calulate it from the specs...
Subscribe to:
Posts (Atom)

